
Paper flowers are nice not only to see, but also to do it yourself. In addition, they have a couple of advantages over their natural counterparts - they are much more accessible and durable. By the way, having learned to make flowers with your own hands, you will never be lost if you suddenly need:
- Pack presents;
- Decorate the house for the holiday;
- Festively arrange table setting;
- Make a prop for a photo shoot;
- Make gifts for relatives, friends, colleagues or teachers / caregivers of the child;
- ... or just update the interior.
From this material you will learn how to make flowers with your own hands from corrugated, colored or tissue paper (silence). You are waiting for 4 step by step master class with pictures and templates, as well as a selection of 70 beautiful photos and useful videos.
Application Ideas
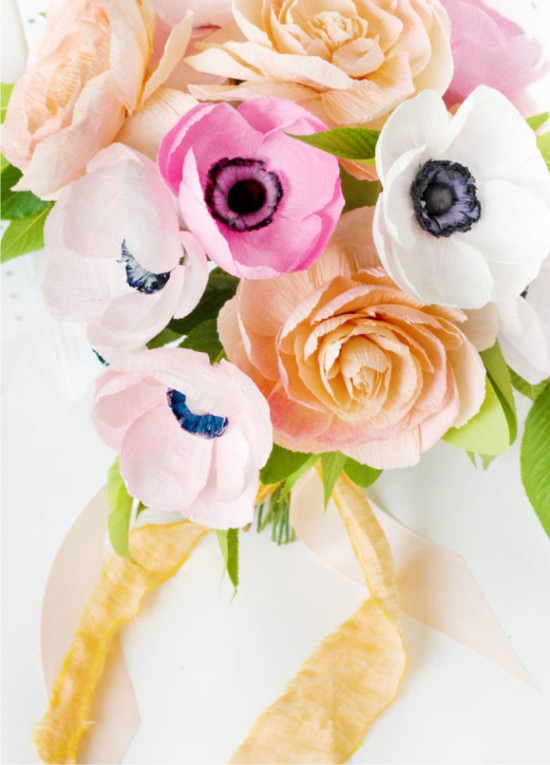
Later we will tell you about the techniques of making flowers from paper, but first we offer to be inspired by photo-examples of their use.
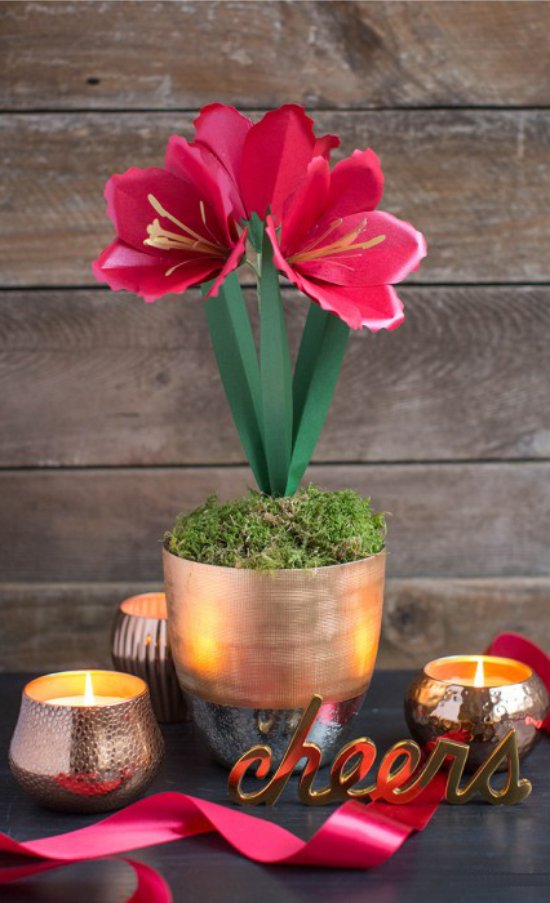
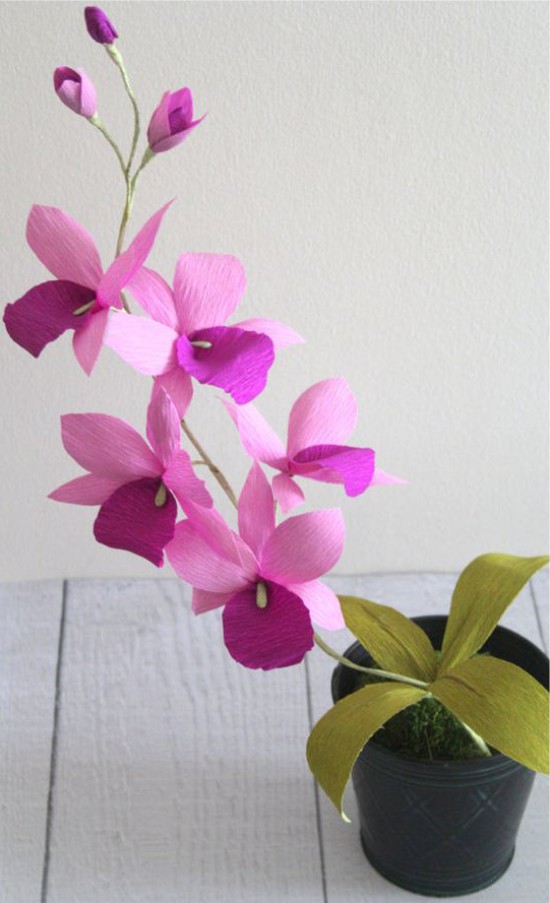
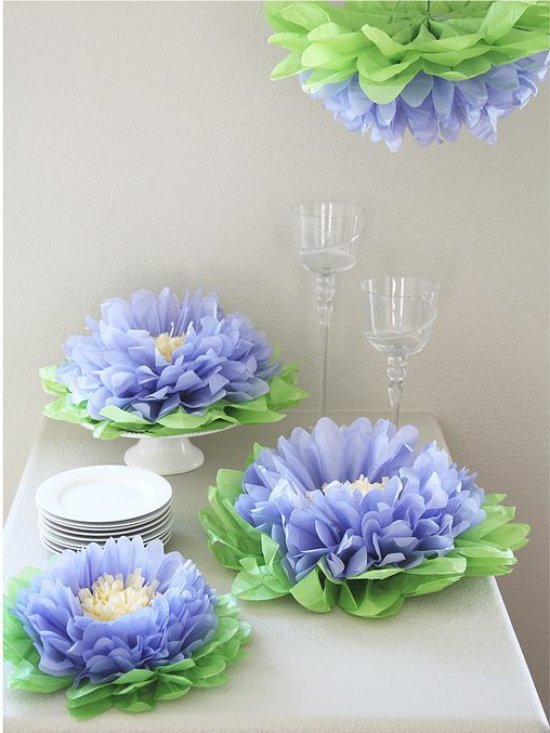
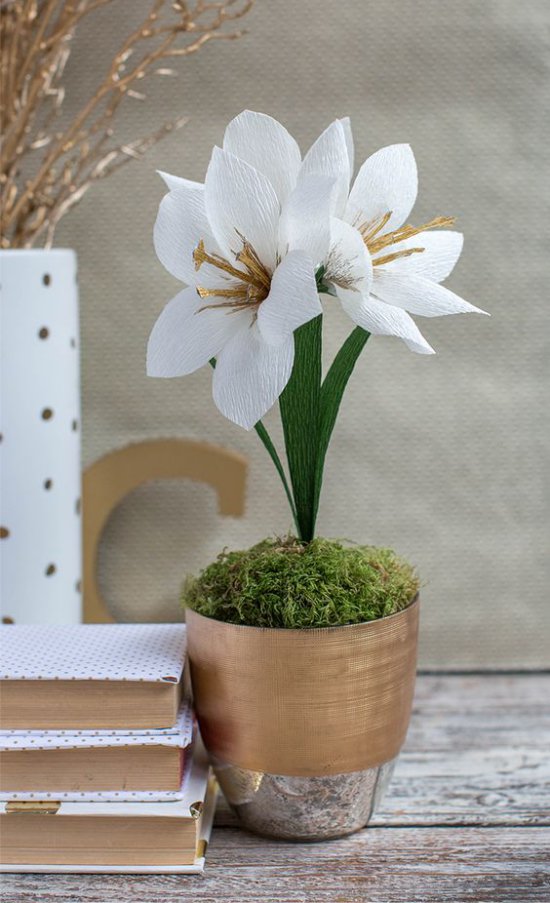
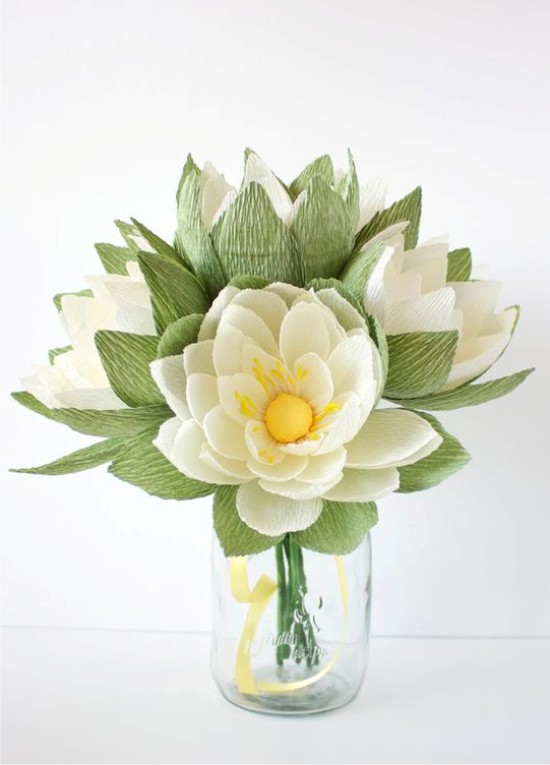
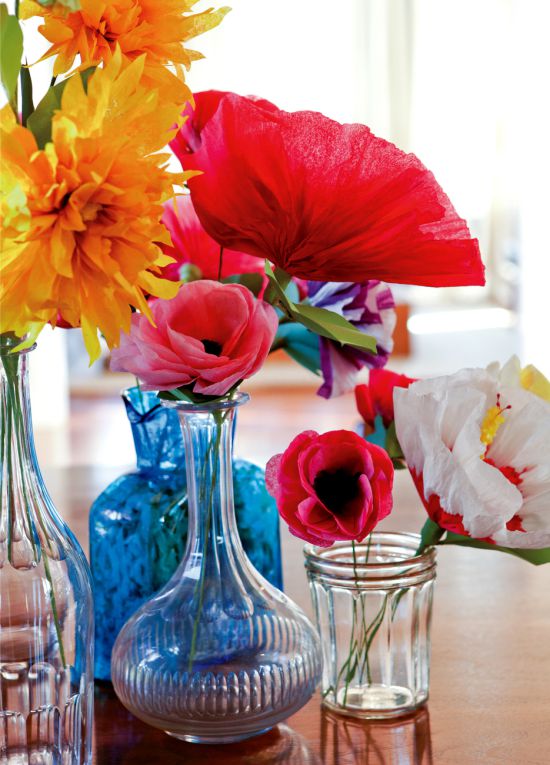
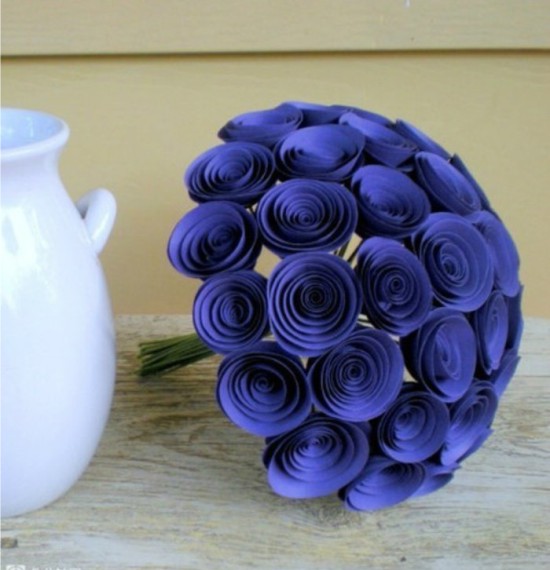
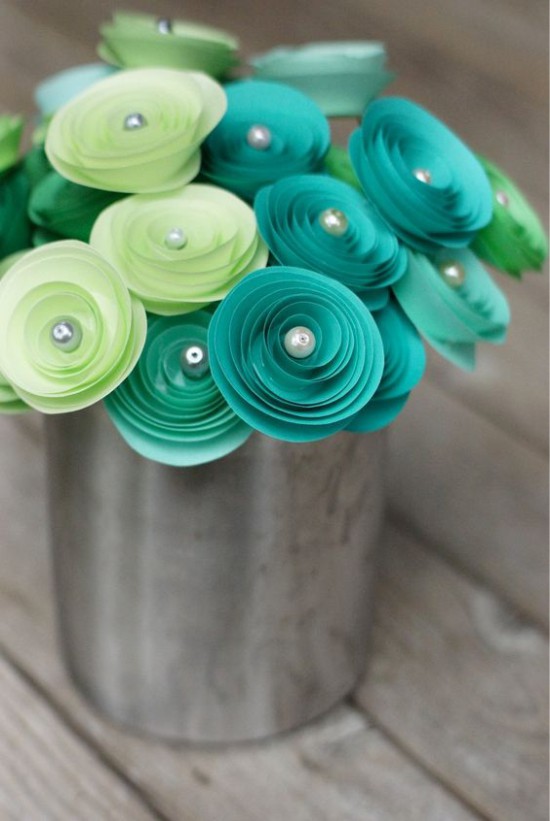
- Bouquets of paper flowers can not only be put in vases, but also “planted” in cute pots. To do this, they must first be stuck in the base of foam or floristic foam. Next, the base should be decorated with dry moss or small stones.
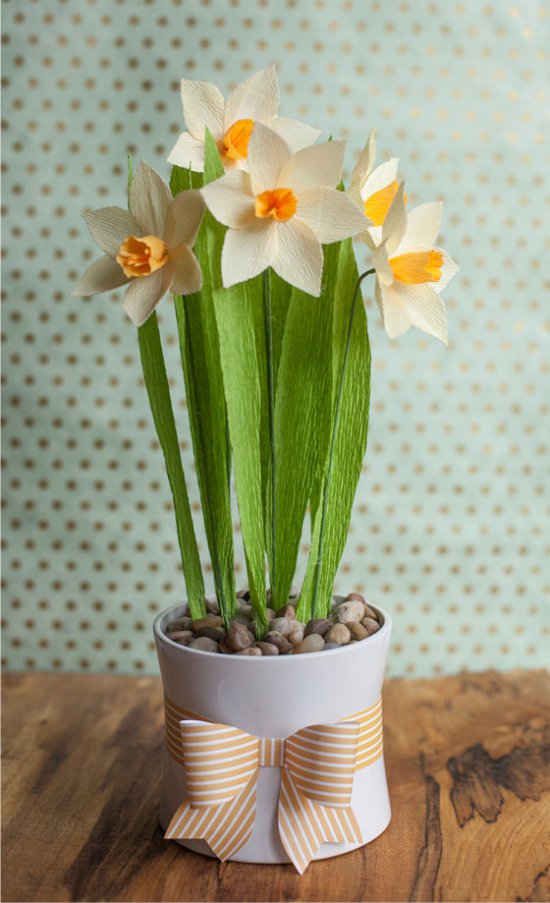
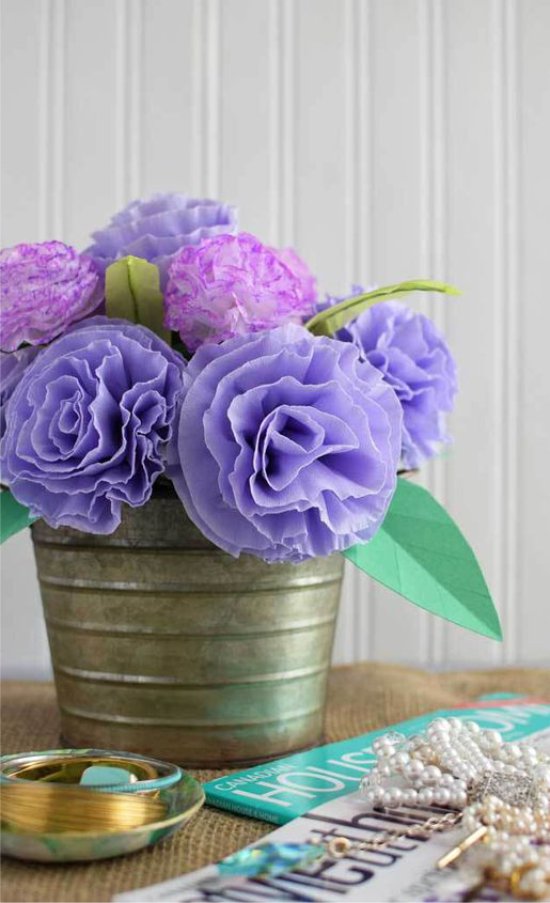

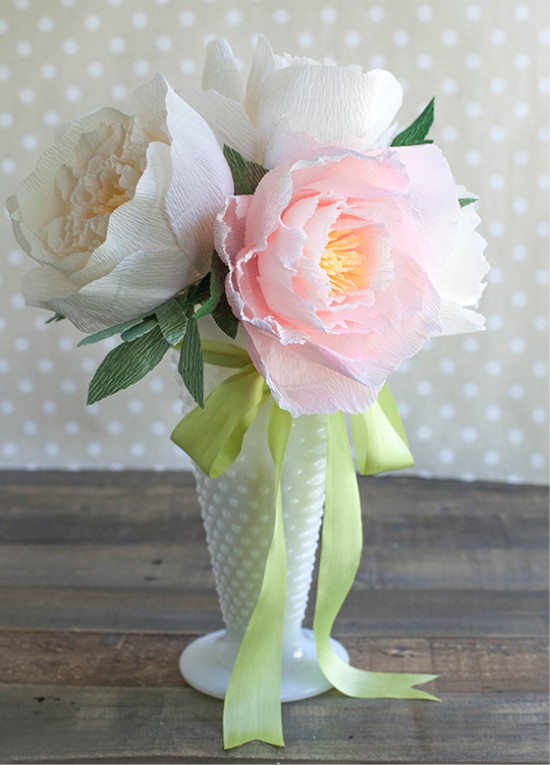
- Paper flowers in vases, pots, or simply buds without stems will decorate birthday table, March 8, Easter, Valentine's Day or wedding.
Tissue paper flowers

- How to make napkins for a festive table setting? Simply place small flowers on top or fold into rings with bright buds.
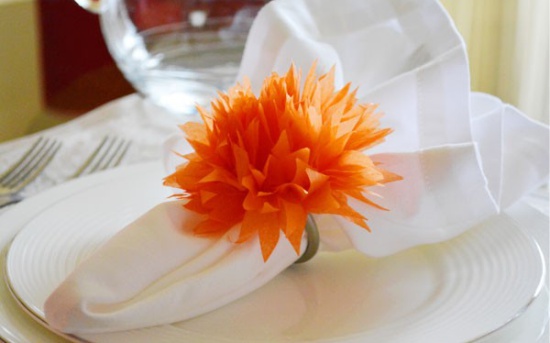
Napkin Ring with Tissue Paper Flower
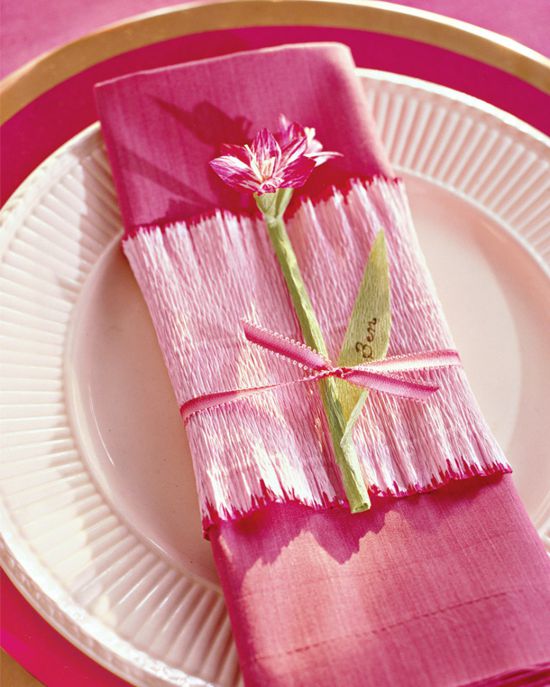
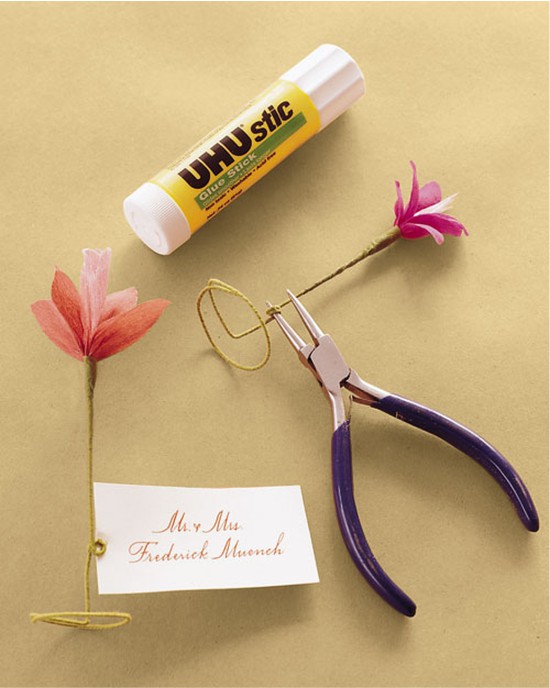
- And here is another attribute for the festive decoration of the table - holders for guest cards.
- To decorate the house for the holiday or just like that you can use such garlands or cascades of flowers.
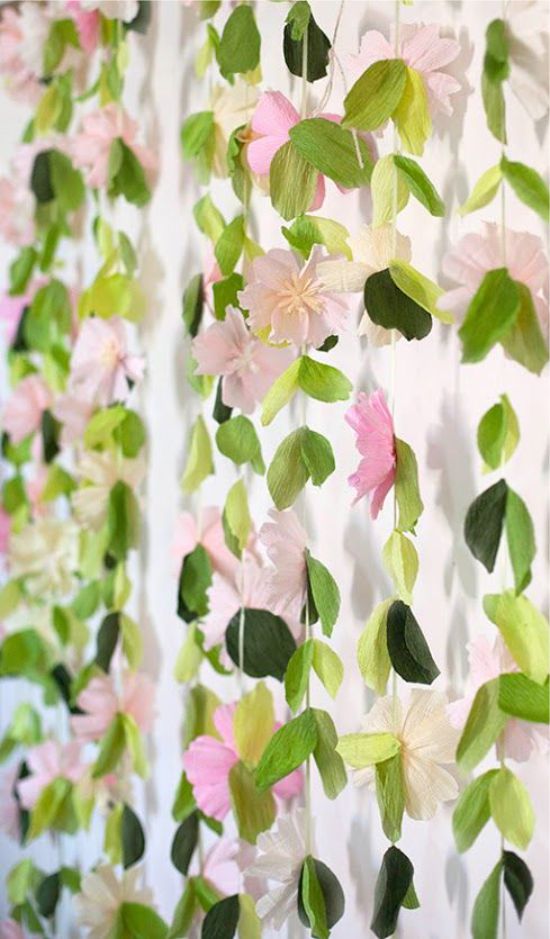
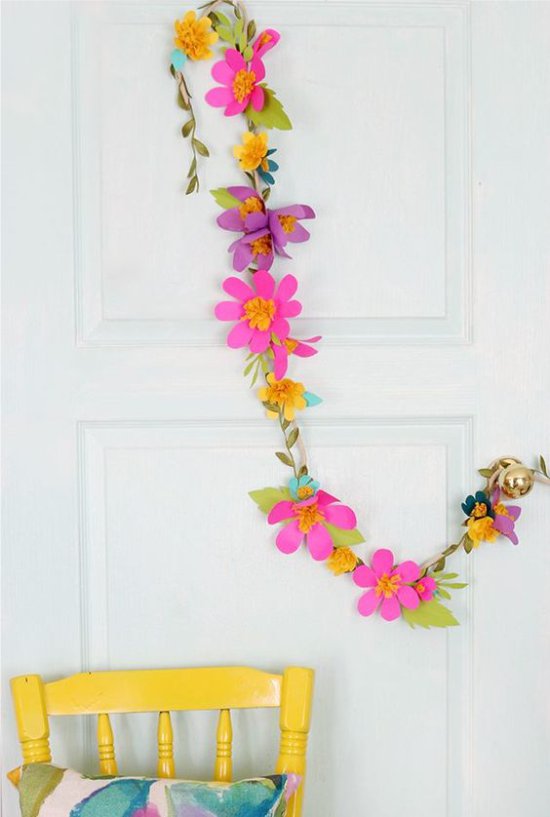
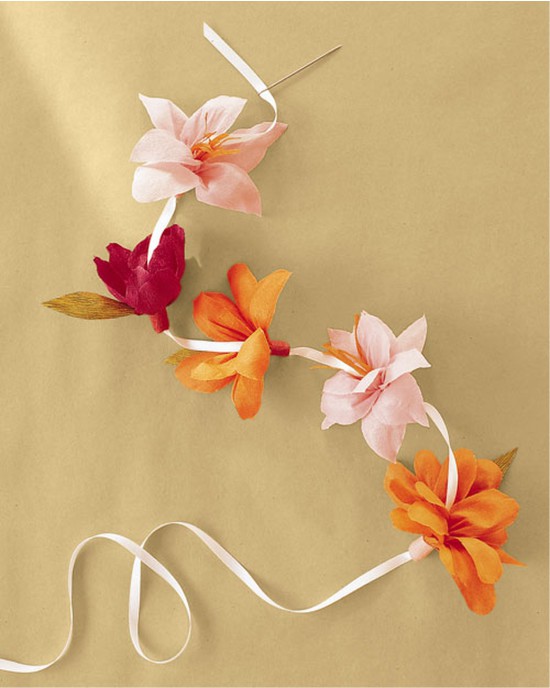
To make such a garland of flowers with your own hands, use ribbon blanks of petals (see MK №1 below, step 3) and skip the steps of making the stem and pistil
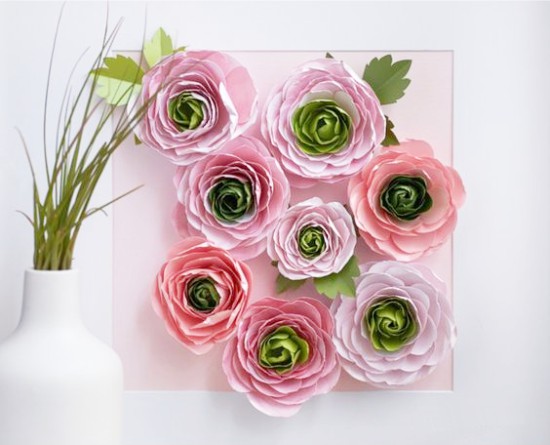
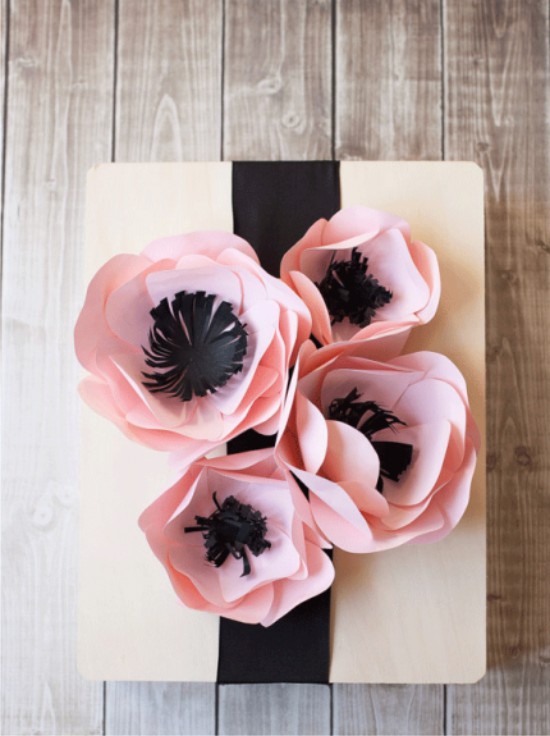
- Take a sheet of cardboard or canvas on a frame, stick buds to it and frame it. Voila, the panel is ready! It can be hung on the wall or presented to a friend.

- You can order a beautiful photo zone from masters, and you can select a couple of days and make it yourself, saving a lot. The second master class provides instructions on how to make big flowers with your own hands.
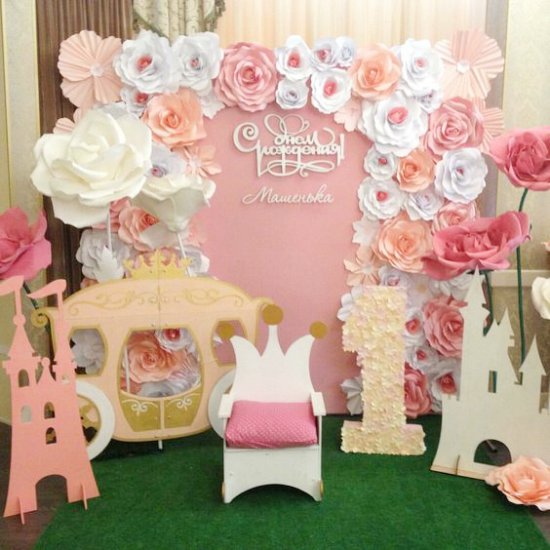
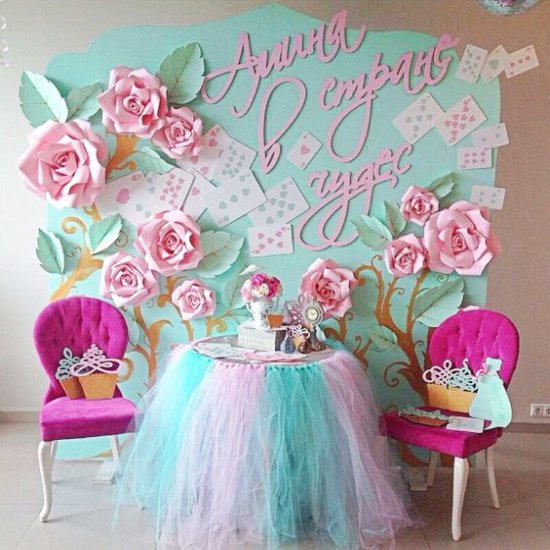
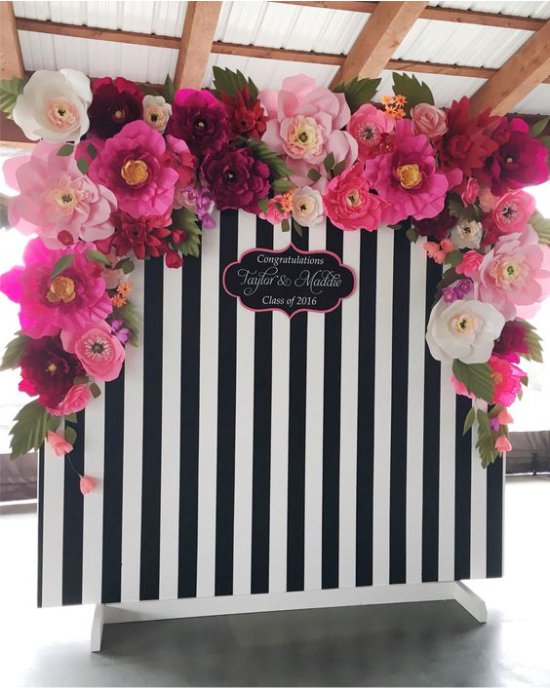

Photo zone with flowers for the child's birthday
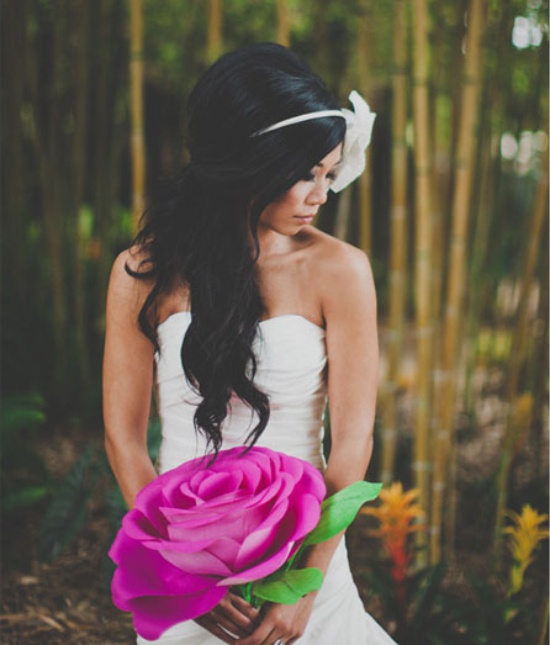
- Large paper flowers can be made for a photo shoot.

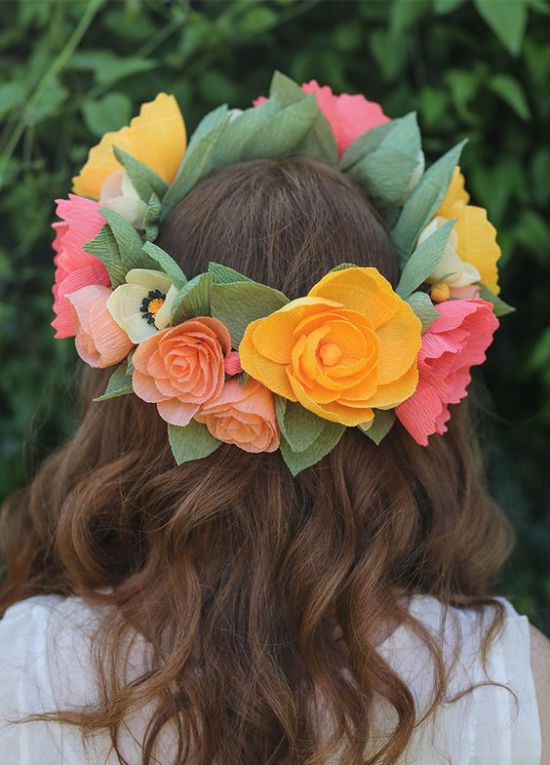
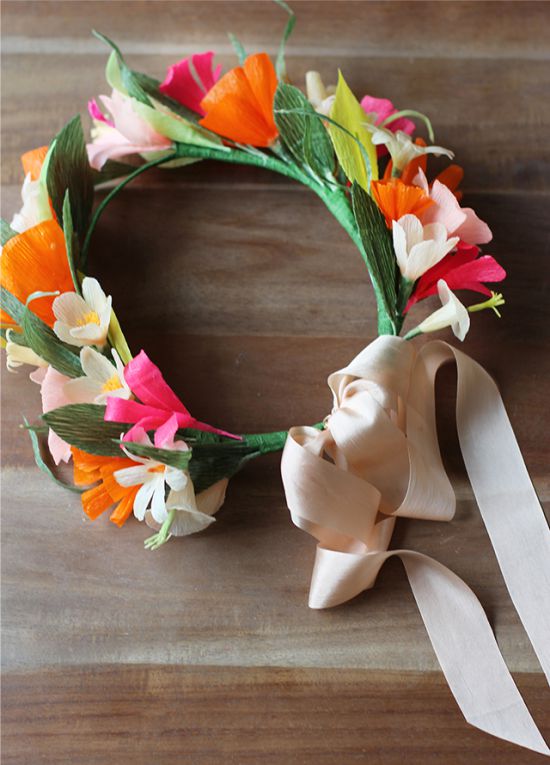
- From flowers from corrugated paper magnificent wreaths turn out. They can be used as an attribute for a theme party and, also, for a photo shoot.
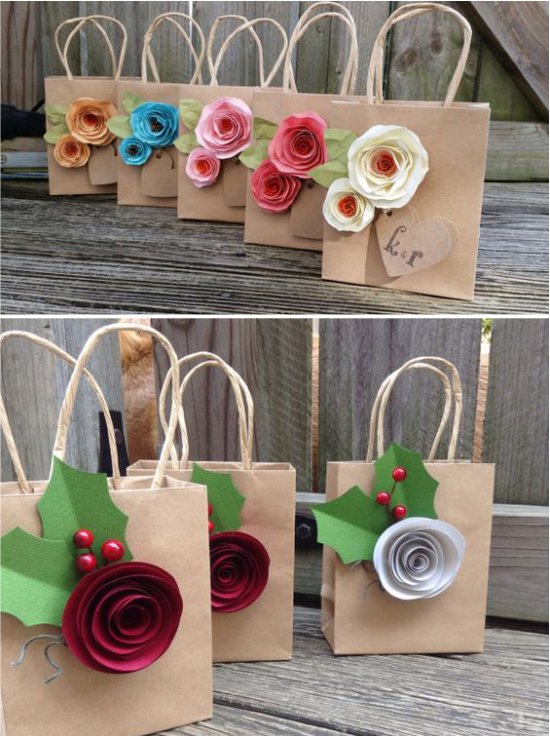
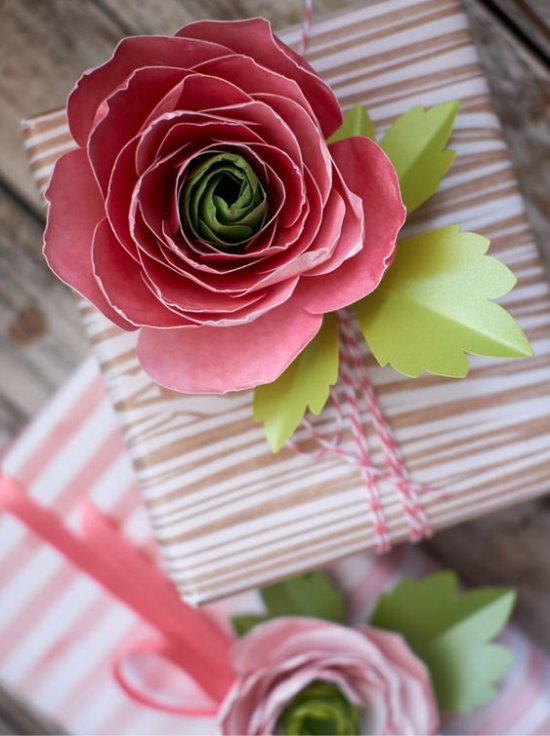
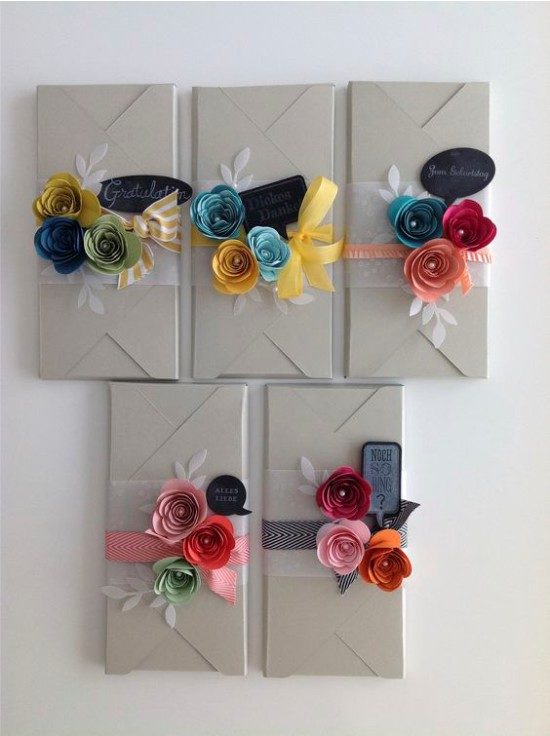
- Even the simplest gift wrapping will be elegant if you decorate it with homemade paper buds (see master class number 1 and number 4). In this collection of photo examples, you can learn a couple of original ideas.

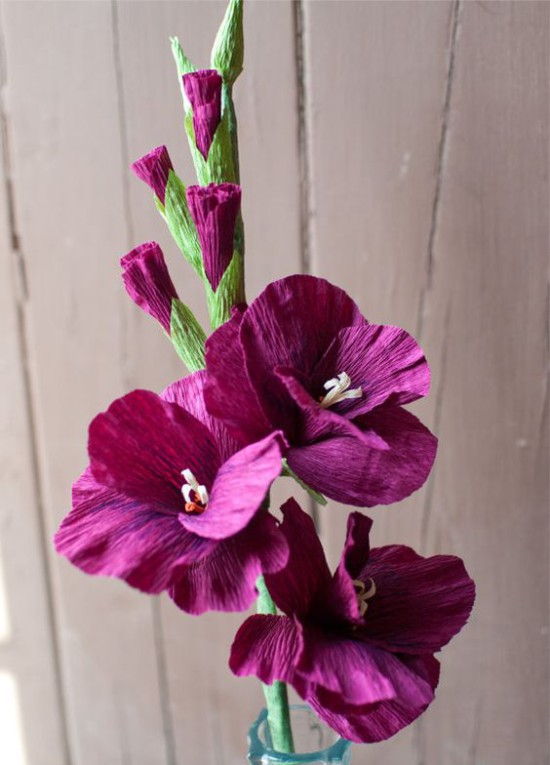
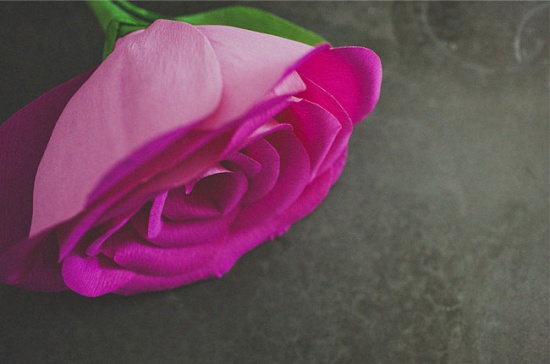
Master class number 1 - Flowers of corrugated paper (basic instructions)
Hand-made corrugated paper flowers can look surprisingly believable. Although at some stages of their production will have to tinker a bit, even a novice can handle the craft from the very first time.
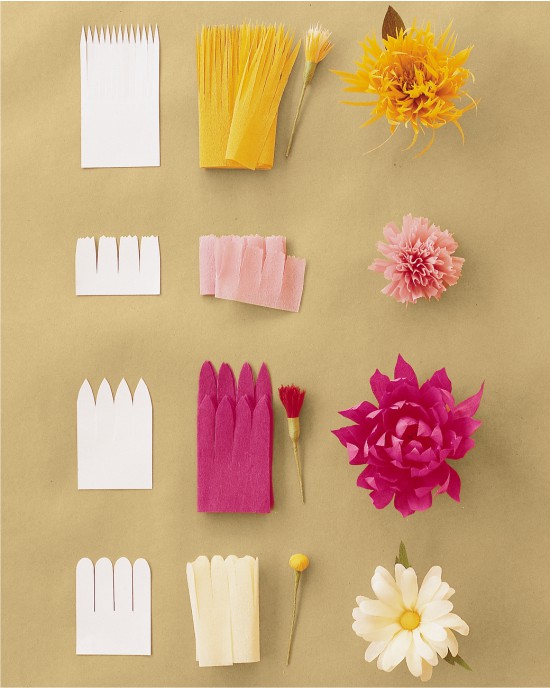
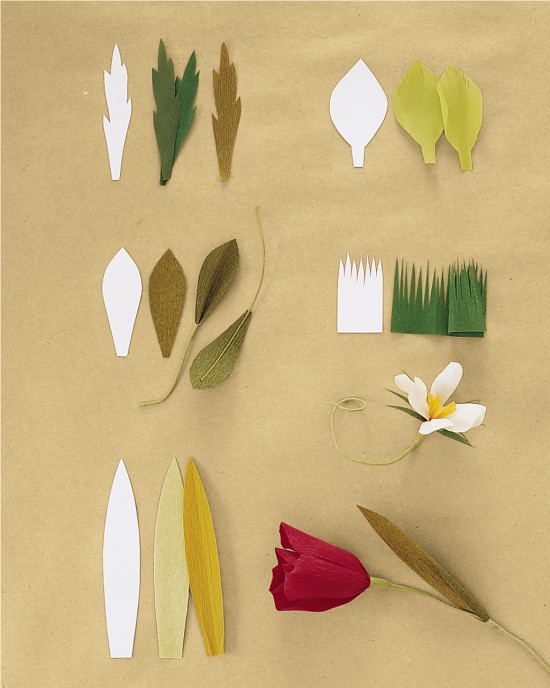
In this collection of photos are examples of colors from paper that you can do yourself, following our step-by-step master class.

For work you will need:
- Corrugated paper of the desired shade (for buds);
- Green corrugated paper (for stems, leaves, sepals) and / or corrugated paper tape;
- Floral wire (wire in a green winding, sold in stores for creativity, on Aliexpress) or a wooden skewer / wire / newspaper tube / knitting needle;
- Scissors;
- Glue (hot glue gun is best);
- Pencil.
Master Class
Although from corrugated (crepe paper) you can make almost any flowers - from roses to tulips - the principle of their production is about the same. The main difficulty is to make the correct petals: give them the desired shape, volume, size, choose the color of the paper, guess with the quantity.
- Following our master class, you will master the basic skills of making flowers from corrugated paper and be able to make roses, peonies, tulips, lilies, daisies, chrysanthemums and dahlias.
Step 1. So first we need to make a stem. If you are using a floral wire, then simply cut it to the desired length: a stem about 30 cm in length will be suitable for drawing up a bouquet, and for, say, a boutonniere will be enough for 15 cm.
- If you do not have a special wire - it does not matter. An excellent stem can be made of a wooden skewer, any flexible wire or newspaper, rolled up into a thin tube with the help of a knitting needle / skewer. At the last stage, your improvised stalk needs to be wrapped with green corrugated paper (we will discuss this later).
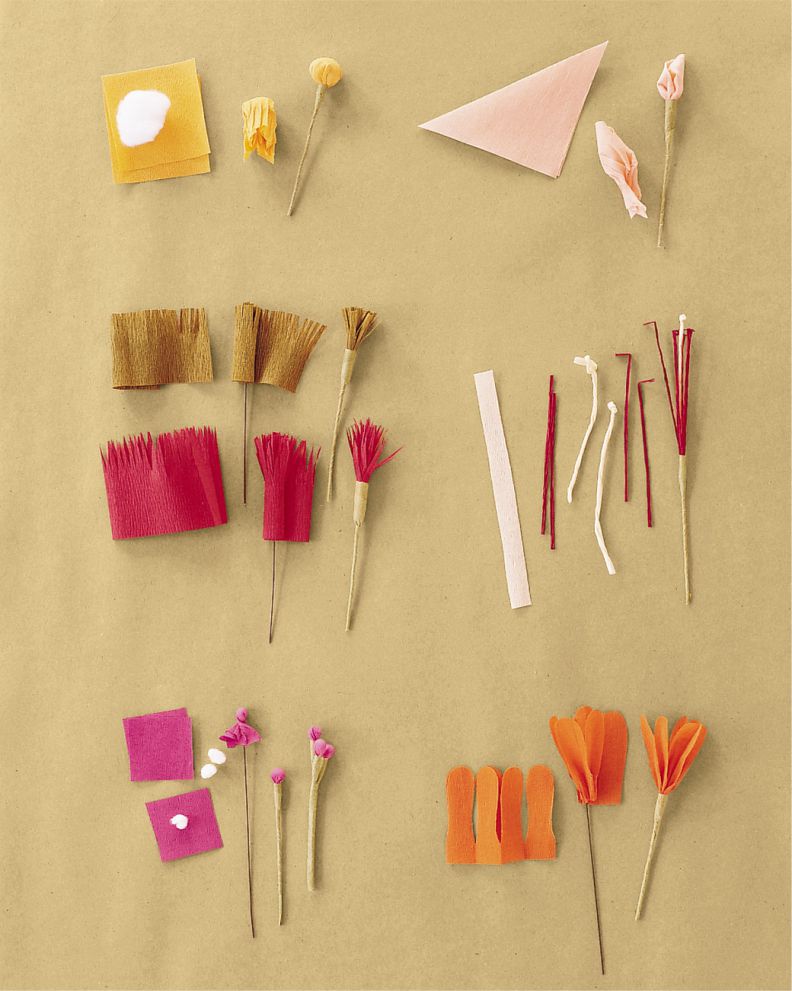
Step 2. Since the pistils and stamens of all colors are different, and sometimes they do not exist at all, there are many techniques for making the “cores” of artificial flowers.
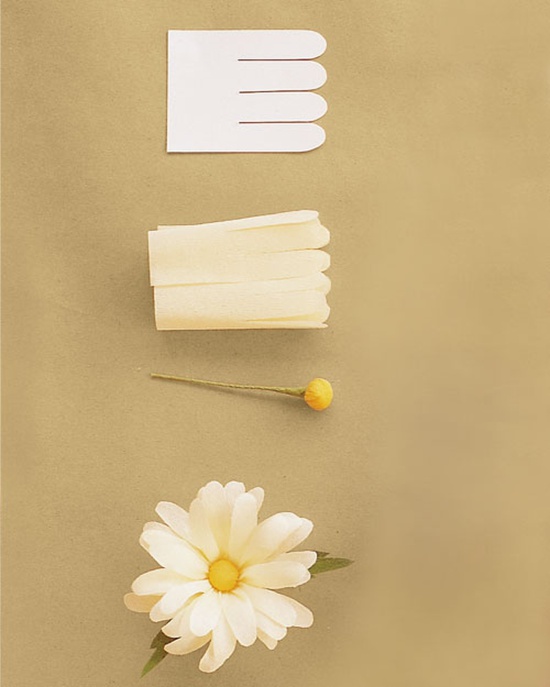
- To make a daisy or a daisy, you need a bud core in the form of a yellow button. Punch a ball of cotton wool on the stem, then wrap it in a pair of yellow squares cut out of corrugated paper, wrap the base of the “button” with a green corrugated ribbon, and finally fix the tape with glue.
- To make a core for a rose, you need to cut a 9x9 cm square from colored corrugated paper, fold it into a triangle, then connect the two corners of the triangle with its top. Next, wind up the torch-shaped billet to the top of the stem with green corrugated tape and fix with glue.
The following photo illustrates the blank for making cores of different colors.
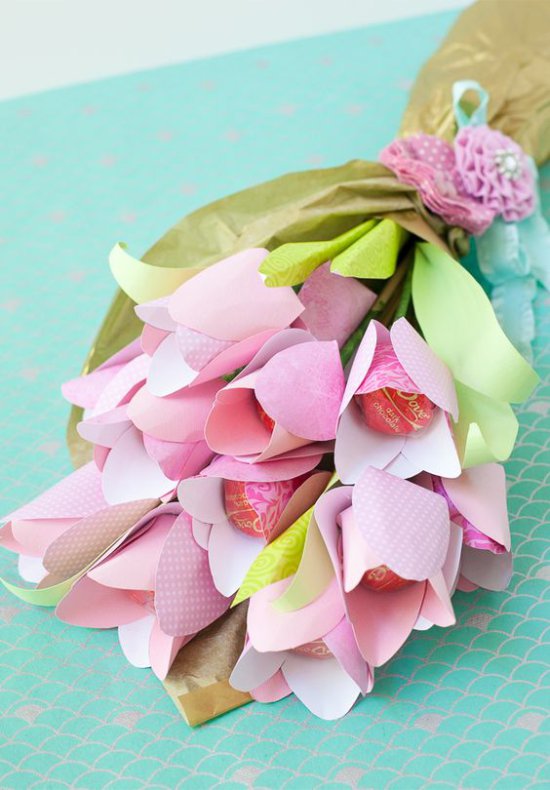
- Would you like to present a bouquet of flowers as a sweet gift (see photo below)? Use candy as a core! To do this, just put it on top of the stem and secure with tape / paper tape.
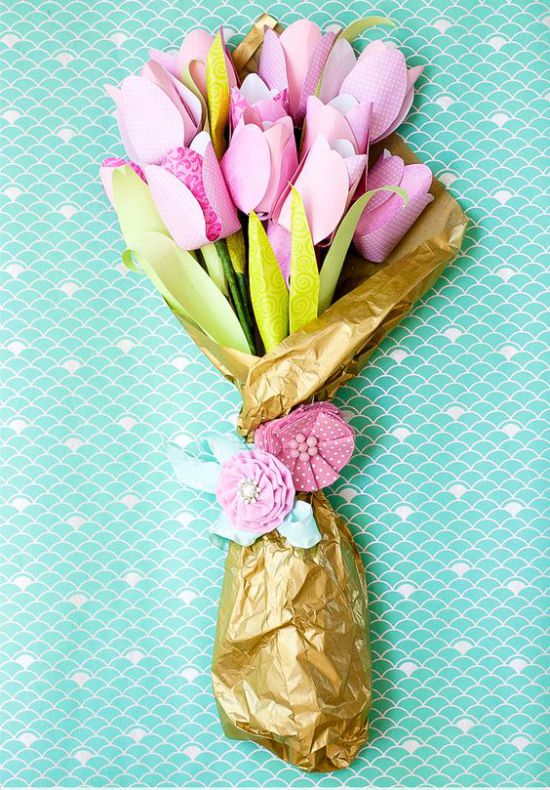 Hand-made candy flowers - a delicious and most soulful gift
Step 3. We proceed to the manufacture of petals and the formation of bud. This stage is the most important, therefore it should be paid more attention. Depending on which flower you want to make, choose one of two methods of work.
Single-petal method (suitable for roses, peonies, lilies and other flowers with a small amount of petals)
As the name implies, the method consists in forming a bud individually, petal by petal.
- The first step is to draw and cut the template of the desired shape and size (see templates below).
- Then the corrugated paper is folded several times, a pattern is applied to it, the outline of the pattern is encircled with a pencil, and then cut with scissors. As a result, you will get several pieces at once. Repeat the procedure several times to get the desired number of petals.
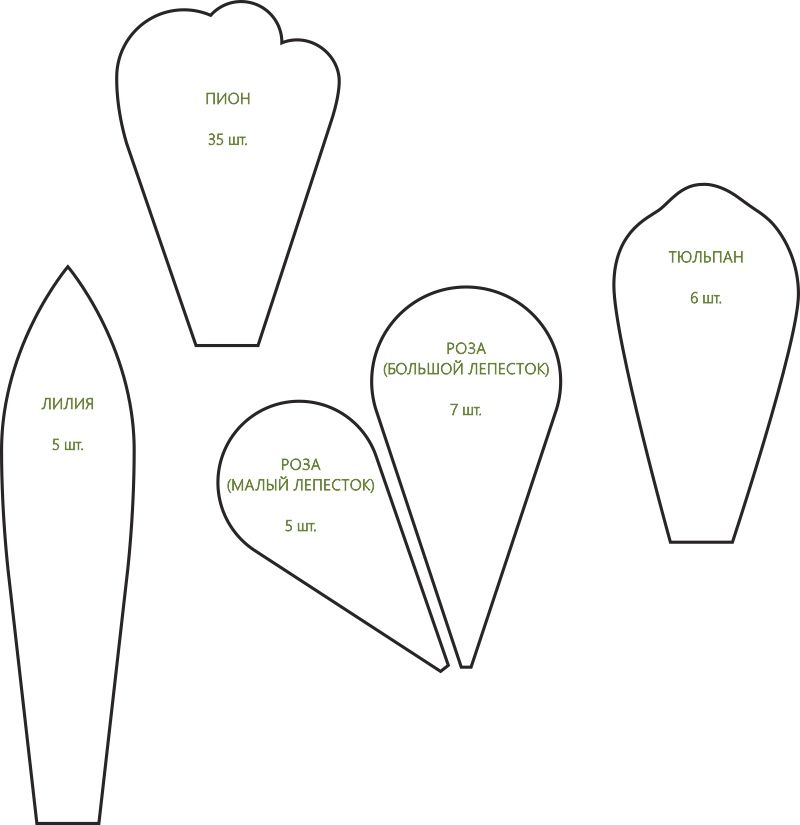
These templates will help you navigate the size, shape and number of petals. Keep in mind that the length of rose petals, peony and tulip should be approximately 9-11 cm, and lilies - 13.5-15.5 cm
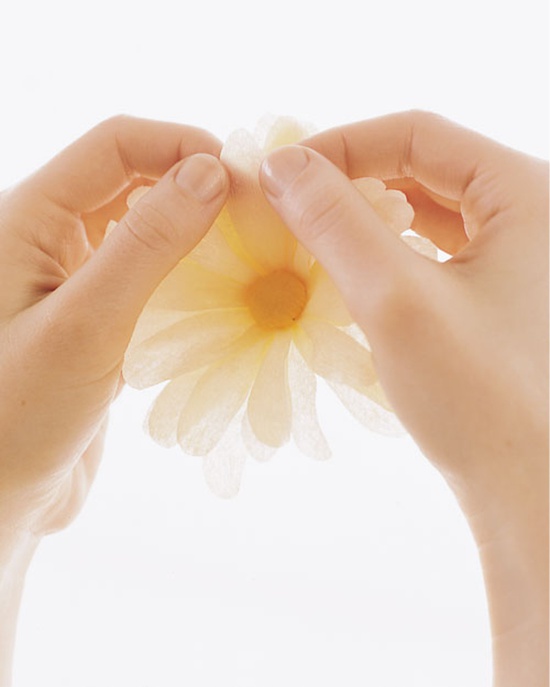
- Next, all the petals need to add volume and bend: slightly stretch and bend in / out, if necessary, wrap the tips on a toothpick / skewer (eg, for a rose). To understand what kind of shape you need to give the petals, just look at the photo of this flower and experiment a little.

Corrugated paper easily stretches, curls and takes a predetermined shape.
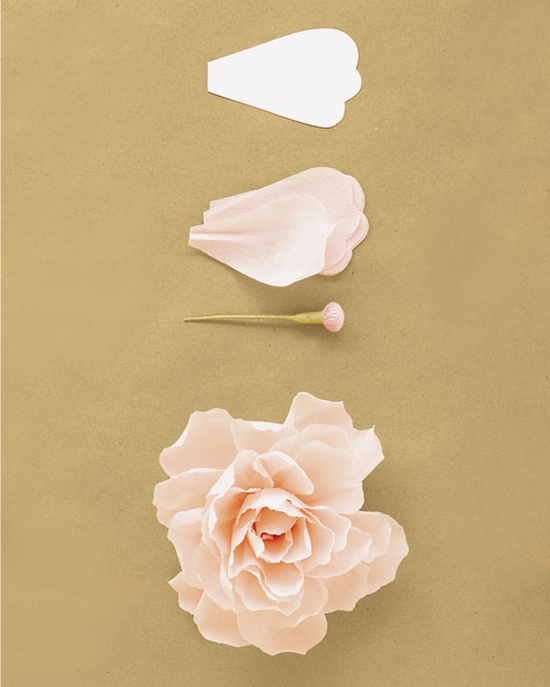
To make a peony, you will need to make 35 petals and a stem with a button. How to make the petals: focusing on the photo, cut out the petals of the desired shape, then slightly stretch them and fold them inward, slightly gather the base of the petals. Glue central petals need lower, and the rest - higher. When the flower is ready, slightly tuck the tips of the petals inside
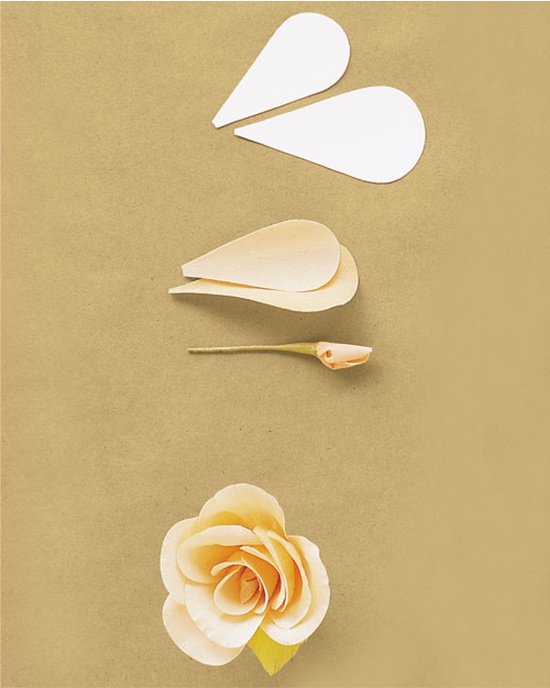
To make a rose, use 5 small and 7 large petals (see the template above). Round the petals just below the middle, and twist the top edges of the skewer / toothpick out. Attach the small petals to the core first, and then the large ones.
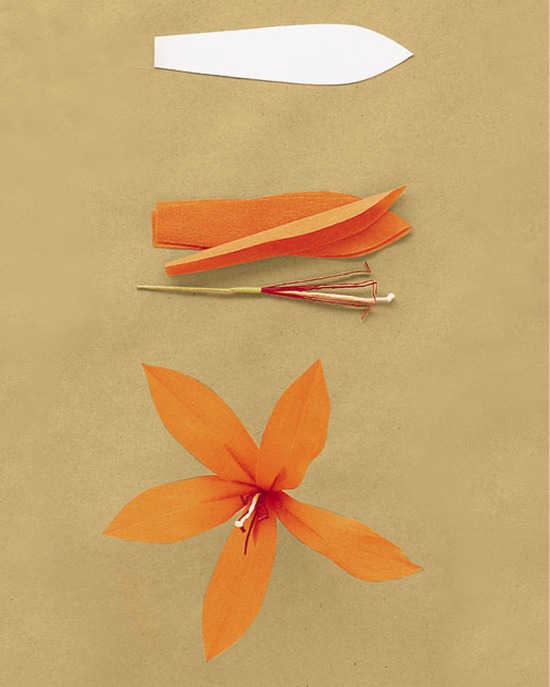
For the manufacture of lilies, use 5 petals (see template above) and a pestle with stamens from red and white corrugated paper. Fold the petals in half lengthwise to form folds, then unfold them. Attach the petals to a bend by twisting them out at the widest point.
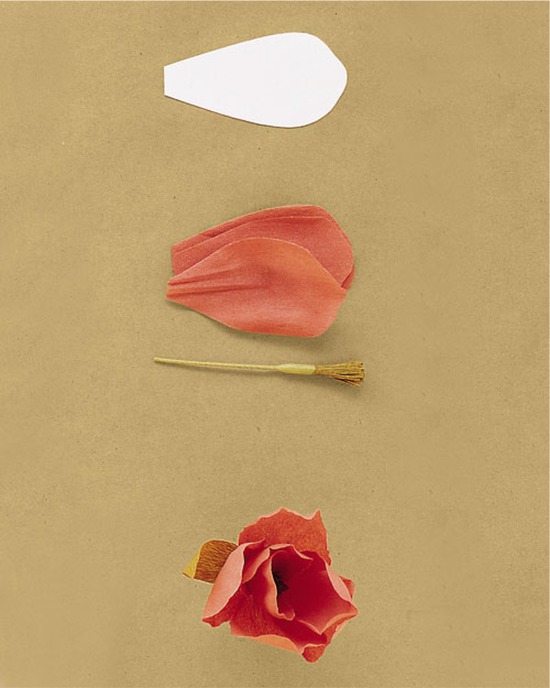
Corrugated paper tulips are the easiest to make. Petals will need only six, they need a little rounded, and the ends pleated
- When all the petals are ready, begin to glue them alternately to the stem, and then on each other, adhering to chess order. Best suited for this purpose hot glue gun. If there are not too many petals, then instead of glue you can use the same green corrugated paper tape (see photo).
Belt method (suitable for daisies, daisies, carnations and other "multi-layered" colors)
The difference with this technique is that the petals are not cut out individually, but from a strip of corrugated paper, when the workpiece becomes similar to a fringe. In this case, the petals acquire volume and bending (sometimes several layers simultaneously) only after attaching the fringe to the stem.
- Cut a strip of desired length and width from corrugated paper, then fold it in several layers and cut out the petals of the desired shape (see pattern below).
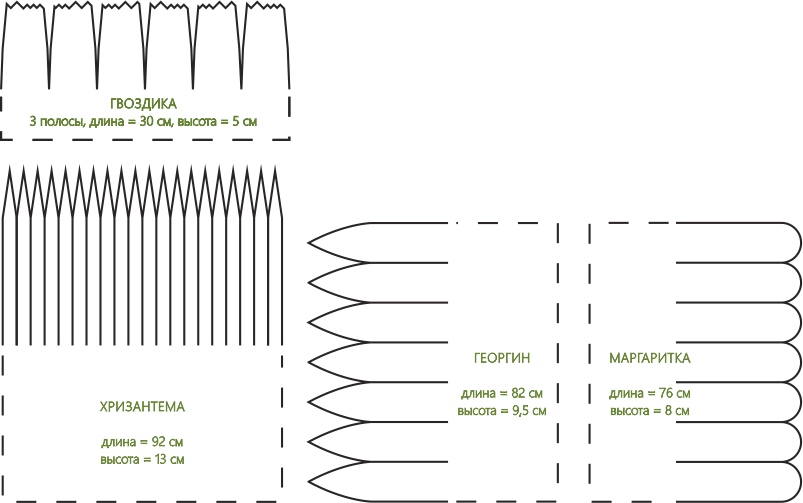
Pattern ribbon petals for flowers from paper
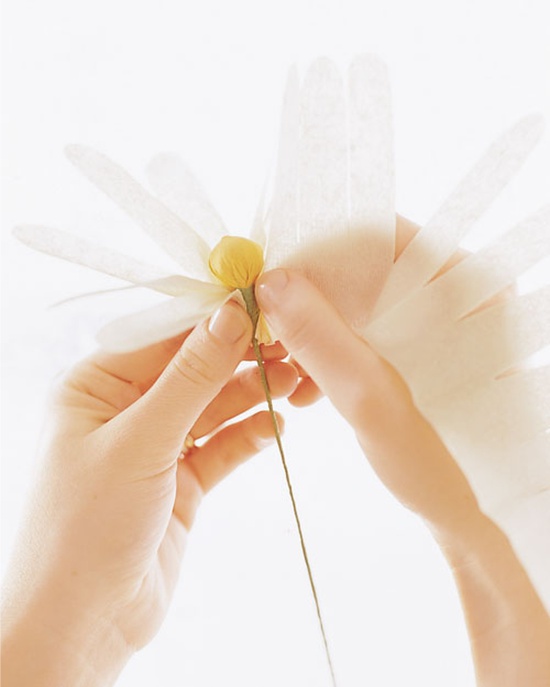
- Tightly wrap the resulting fringe around the pestle and secure it with a green corrugated tape, tape or glue. If there are too many layers, so that the bud does not slip out of your hands, the fringe should be cut into several pieces.
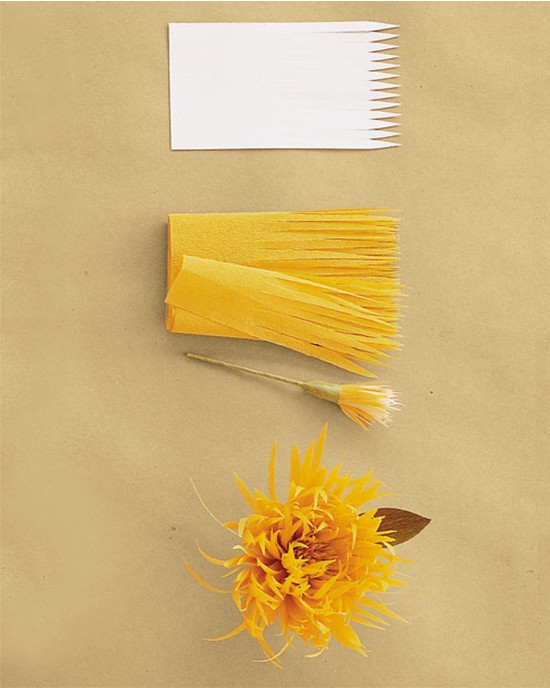
The central petals of chrysanthemum need to be wound around the pistil rather tightly, the rest - more freely and slightly higher.
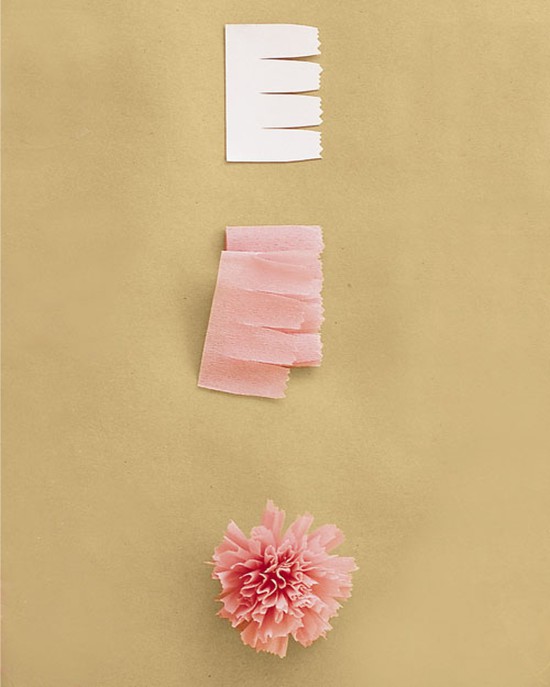
Cloves are made of three bands (see pattern). The first strip you just need to tightly assemble in a bundle and fix the tape / tape. The second and third strip should be wrapped around it, holding and aligning the lower part of the bud. Next, the bud is fixed with a corrugated tape or glue. At the end, pull the petals outward to give the carnation a rounded shape.
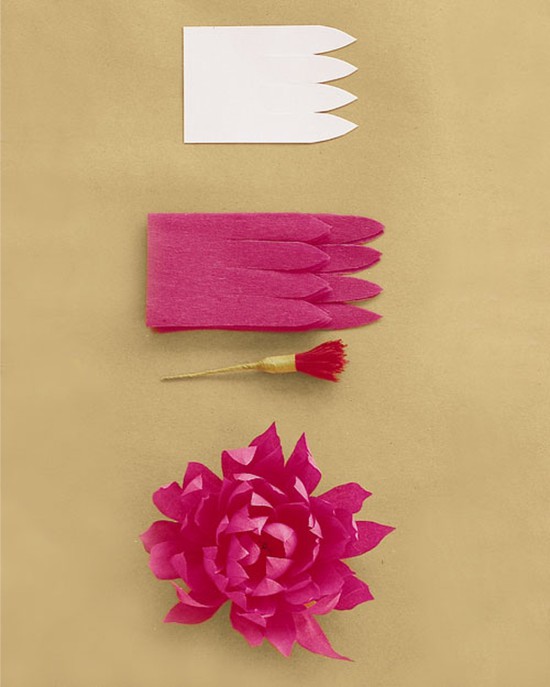
To make dahlia, start winding the billet just below the pistil, but later wind the petals, going higher and higher. Give the petals a round shape, twist the tips inward a little and, finally, pinch the tip of each petal to form a crease.
- Give the petals a bend, if necessary.
- Now that the flower is almost ready, it needs to be supplemented with sepals and leaves on the stem. To do this, cut the blanks of leaves in the appropriate quantity, shape and size (focus on the photo or patterns) and simply stick in the right places.
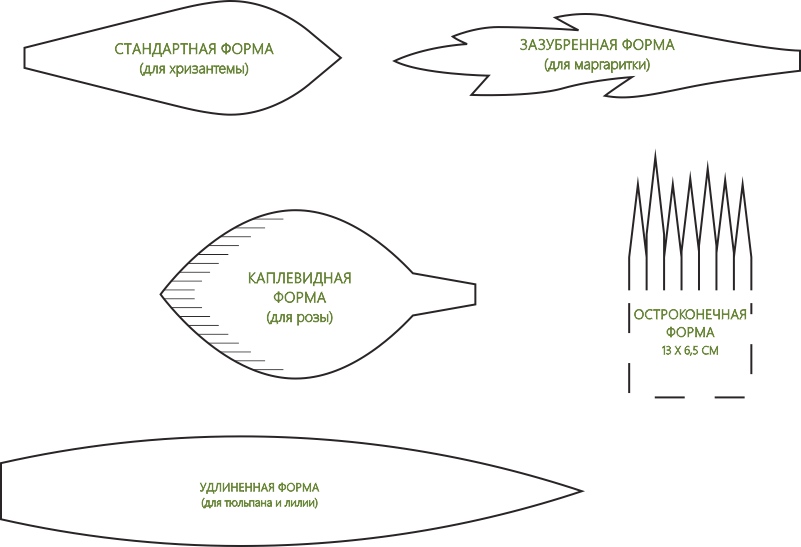
Leaf pattern
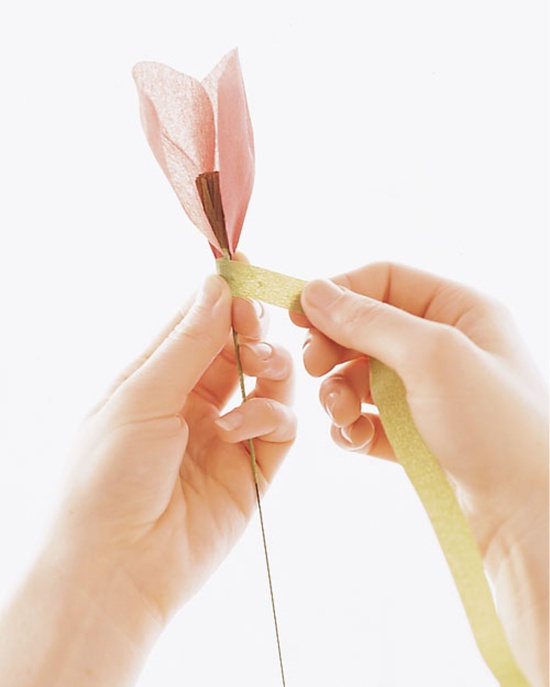
- Sepals are glued under the bud, then they are given a bend and volume.
- To make leaves for some types of flowers, such as tulips or lilies, simply cut the workpiece and glue them to the stem. However, some flowers have leaves with cuttings and they need to be done a little differently. Cut the leaves (with a small margin for attachment), then glue them to a small piece of wire, wrap the wire in green paper, then glue the handle to the stem. If desired, paper leaves can be replaced with artificial ones.
The principle of attachment of leaves to the stalk
- Hooray, your corrugated paper flower is almost ready! It remains only to wind the entire stem with a stripe / ribbon of green corrugations, starting with the sepals and simultaneously wrapping the place where the leaves are fixed. At the beginning and at the end of the stem, the winding should be fixed with glue.
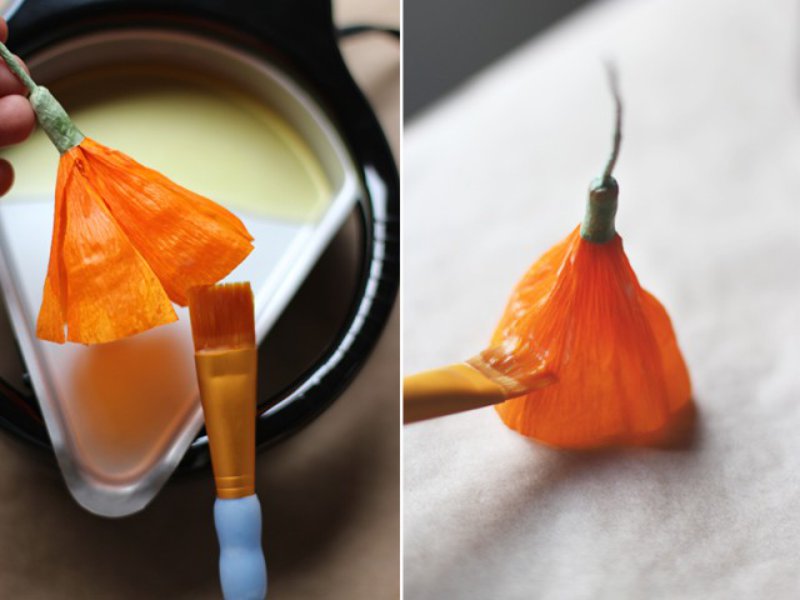
- In order for handmade flowers to have an even more realistic look and retain their beauty longer, cover them with melted beeswax and let them dry.
To better understand how to make flowers from corrugated paper with your own hands, the following video tutorial will help you.
See also the material: How to make flowers from fabric - 4 workshops for beginners.
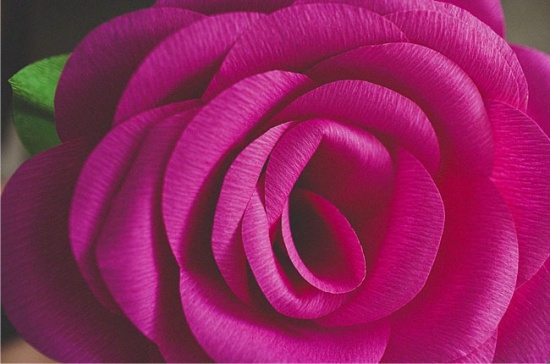
Master class number 2 - Big rose of corrugated paper
Large, hand-made flowers are good for decorating photo zones, ceilings and walls during holidays (for example, at a wedding or birthday party). And they can become a spectacular props for a photo shoot.
For work you will need:
- A roll of corrugated paper of the desired color 50 × 200 cm (1 roll / 1 flower);
- Green corrugated paper roll (for stem and sepals);
- A4 paper (you can use office paper);
- Hot glue gun;
- Scissors.
How to make big paper flowers:
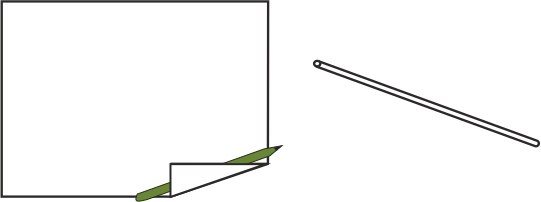
Step 1. First we make the stem. Take a sheet of white A4 paper, put a pencil on the corner, then roll the paper into a tube.
Step 2. Fully fold the roll of corrugated paper. First, fold it in half, then double again, then again ... you get a rectangle? Now fold it in half to make a square approximately 25 × 25 cm in size.
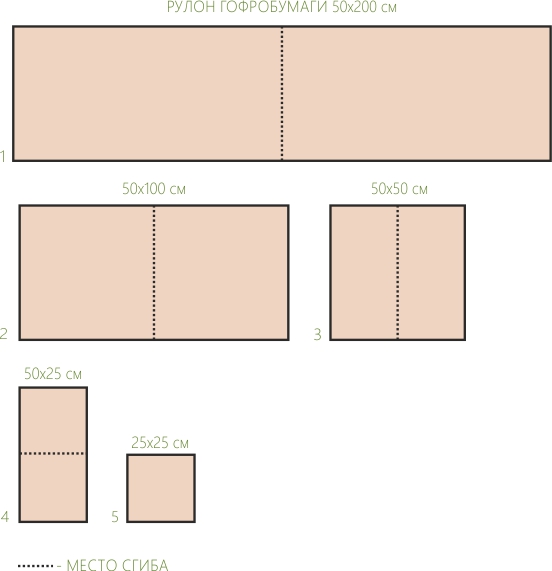
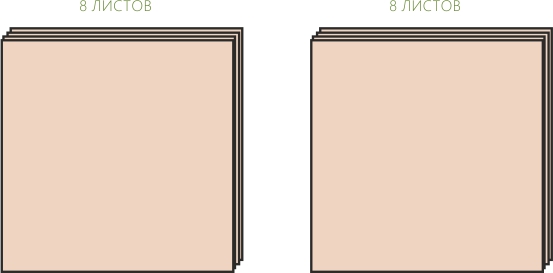
Step 3. Cut the folded paper in all the folds with scissors. You will have two identical stacks of square sheets, from which we will cut the petals.
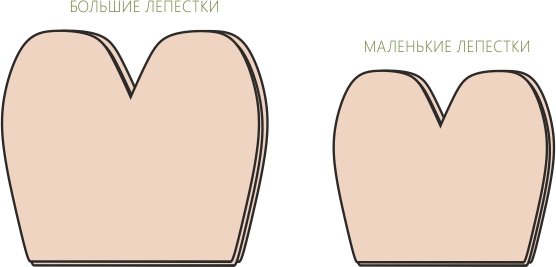
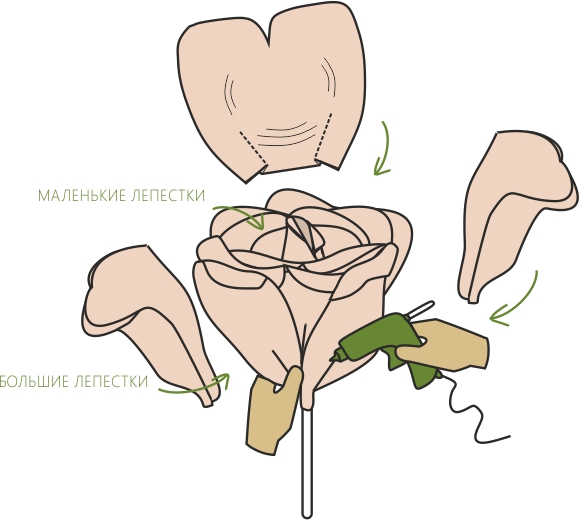
Step. four. Fold each stack in half. From the first stacked stack of rectangles, cut out a shape that looks like a half heart, as shown in the diagram below. From the second pile, cut out the same shape, but smaller.
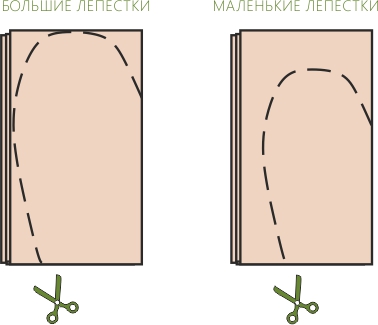
Expand the stacks to get these petals.
Step 5. Twist the tips of the petal with a pencil or pen, and stretch the petal slightly and bend it inwards.
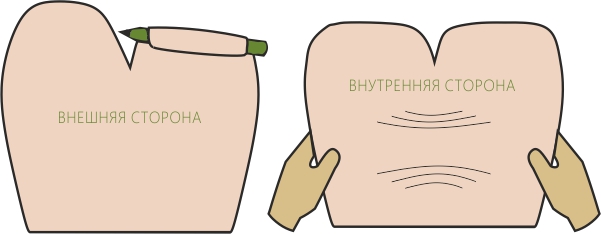
Step 6. Give the petal an even more rounded shape, making two folds in its lower part and fixing them with hot glue.
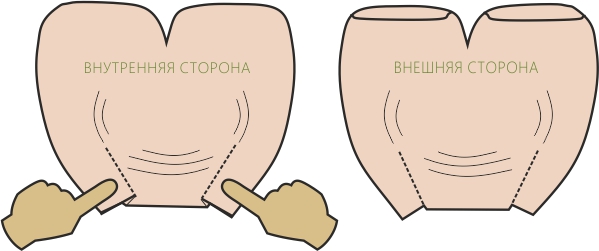
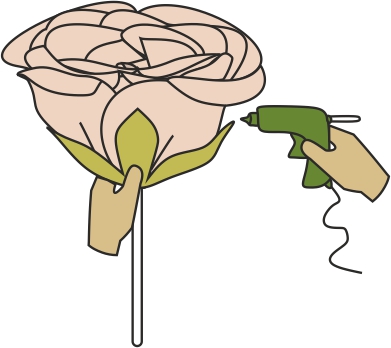
Step 7. Getting to the formation of the bud. Roll one of the small petals around the stem tightly enough.
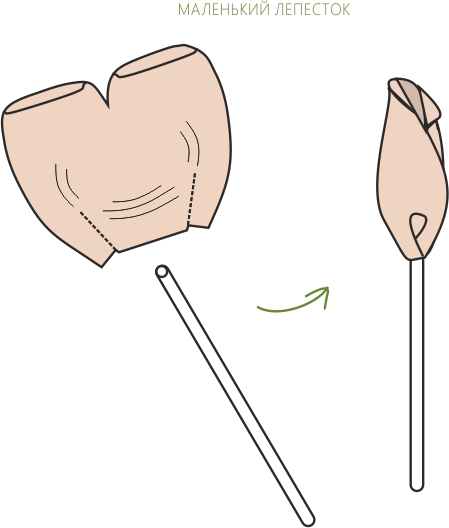
Step 8. Start to glue the rest of the small petals, adhering to the chess order. When the small petals end, continue to grow the bud with large petals. In total, your rose will “overgrow” with 15 petals (+1 petal in the center of the bud).
Step 9. A square sheet of green corrugated paper (25 × 25 cm) is folded diagonally to form a triangle, then fold the triangle 2 more times in half. From the resulting multi-layered triangle, starting from the fold line (!), Cut out the shape as in the picture below. When you flatten the cut out, you get a quatrefoil.
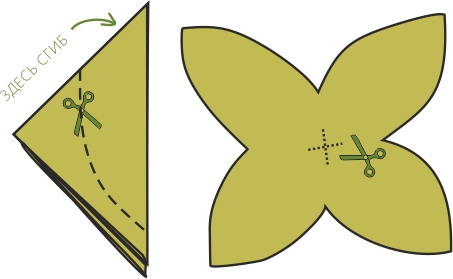
Step 10. Make a small cross-shaped incision in the center of the quatrefoil, (see figure above), put it on the stem to the bud through the resulting hole, then glue the leaves with hot glue.
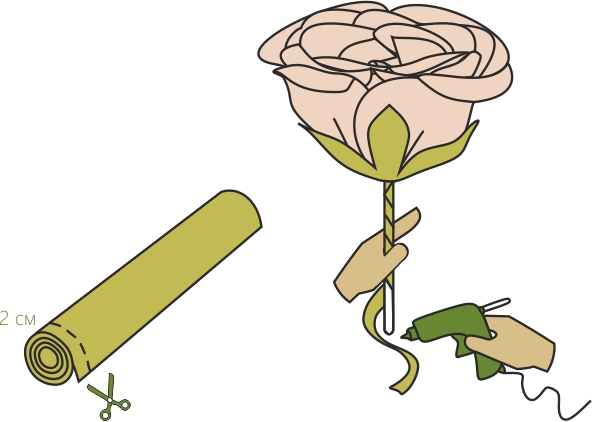
Step 11. Hooray, our big rose is almost ready. It remains only to wrap the stem in green paper. For this you need to roll it into a roll, then from the edge cut off about 2-cm wide piece from it (that is, just as if you cut a piece from a roll).Now dissolve the resulting tape and wrap the stem with it, fixing the upper and lower ends with glue.

In the following video, you will learn how to make big flowers with your own hands from paper in silence.
See also the material: Flowers from ribbons do it yourself - 6 workshops for beginners.
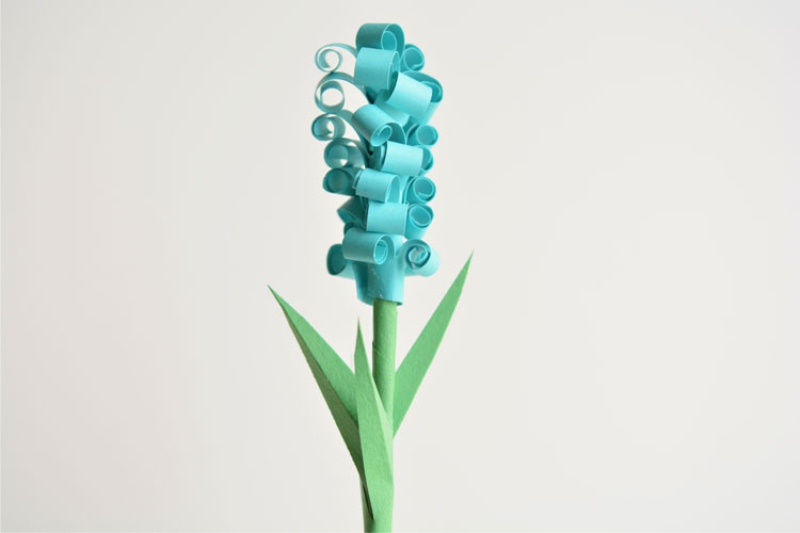
Master class number 3 - Hyacinths from colored paper (suitable for children's creativity)
These hyacinths look as if they were made by a quilling expert. In fact, even a child can make such flowers out of paper with their own hands! Making the first hyacinth will take some time, but for each next flower you spend no more than 5 minutes.
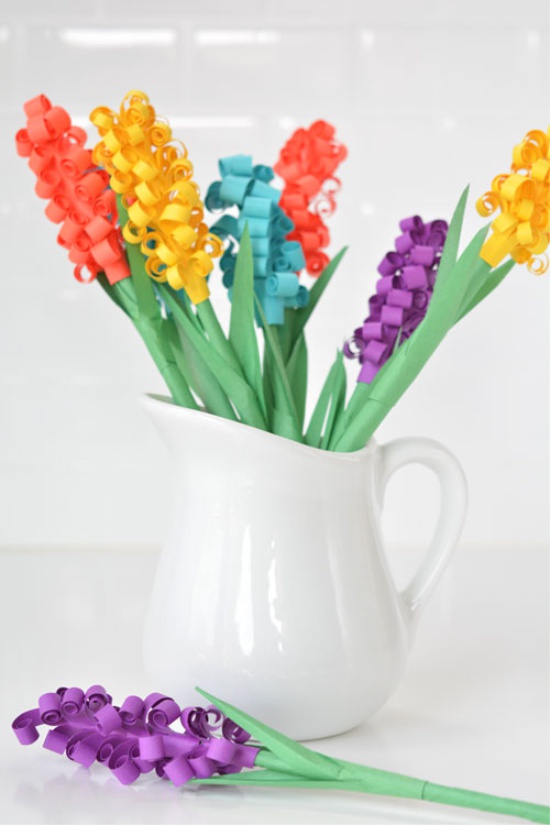
To make such a bouquet of flowers with your own hands, you need a little more than half an hour
To make paper flowers you will need:
- Color paper or not too thick cardboard (for buds);
- Green paper (for stems);
- Scissors;
- Ruler;
- Pencil;
- Glue stick;
- Knitting needle or wooden skewer.
Master Class
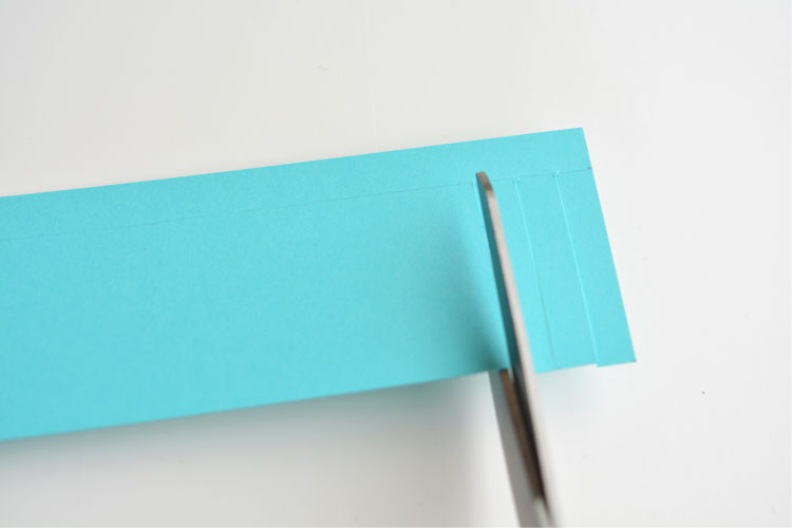
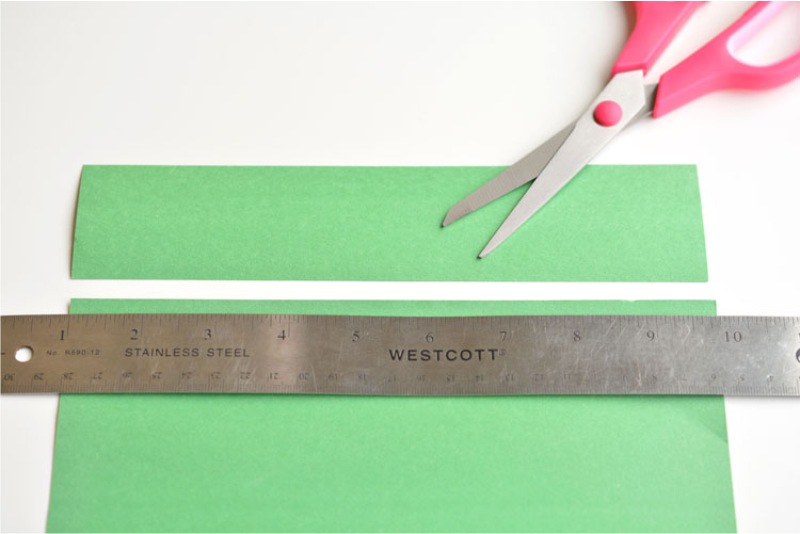
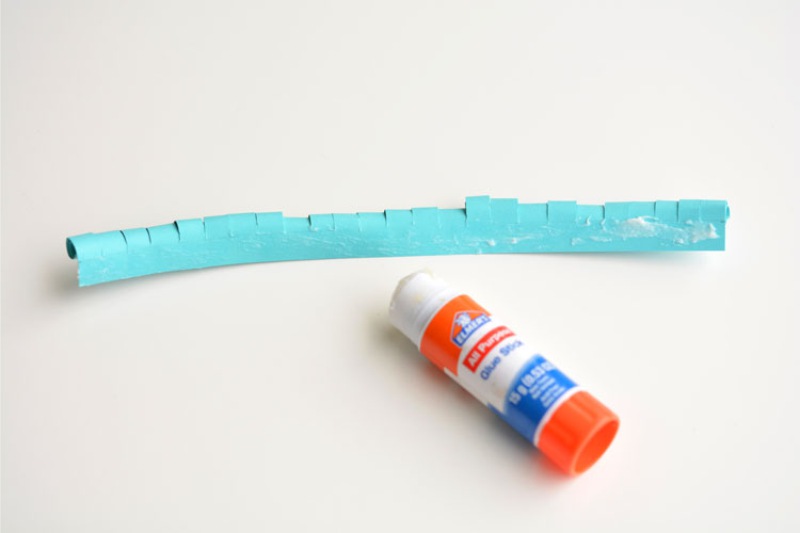
Step 1. Cut a strip of about 21 × 2.5 cm. If you are using A4 colored paper / cardboard, you just need to cut the sheet across.

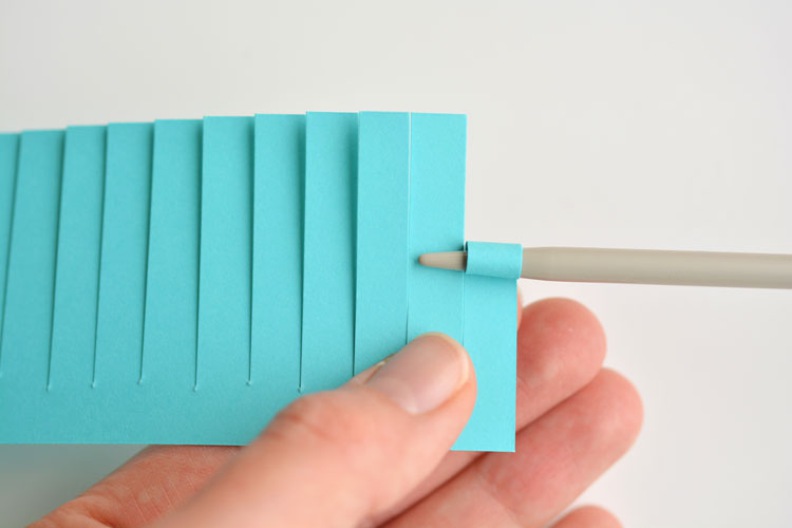
Step 2. Stepping back from the top edge of 1 cm, draw a line along the strip with a pencil with a ruler. Next, use scissors to cut your blank into strips about 5-7 mm wide, not reaching the previously drawn line. You get something like a ribbon with a fringe. Try to cut the paper into even and parallel strips, but do not worry about errors, because they will not be visible when folded.
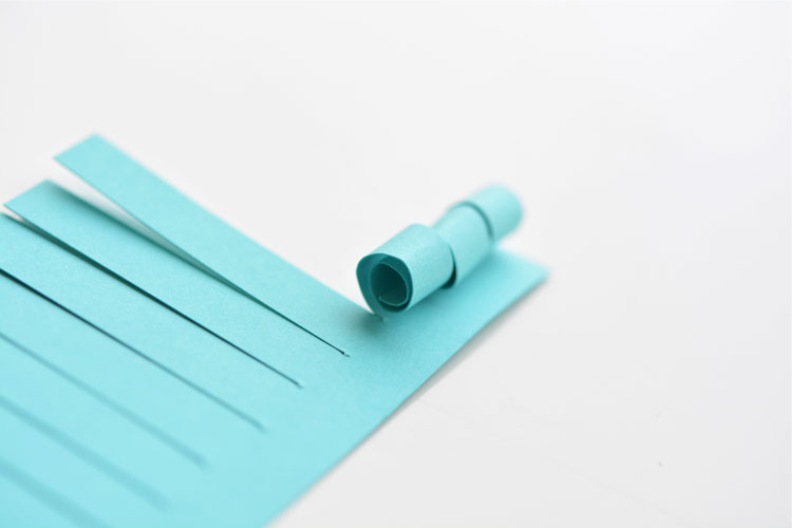
Step 3. Using a knitting needle or wooden skewer, carefully roll each strip into a roll until it stops. Make sure the pencil line is on the back of the paper.
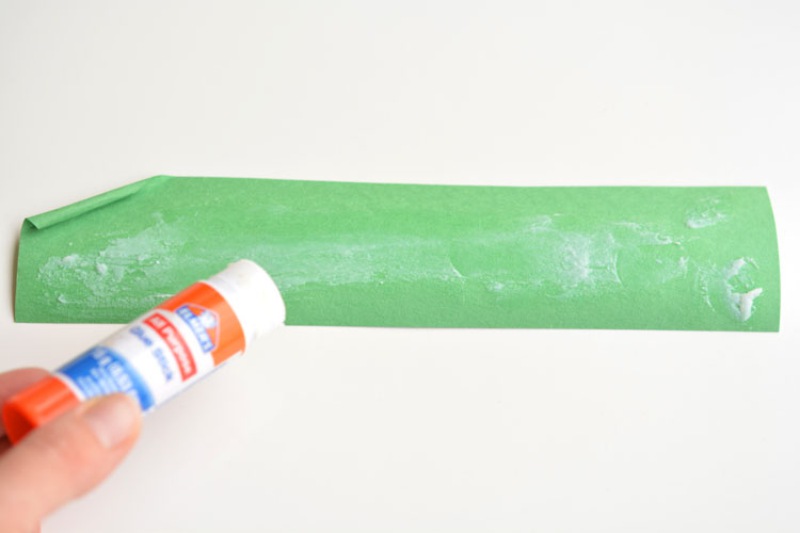
Step 4. Now we will deal with the stem. From green paper (cardboard will not work!) Cut a strip of 21 × 2.5 cm.
- By the way, if you want to save time, then just use green straws as stems.
Step 5. Twist one of the corners of your strip diagonally, then lightly go around the whole strip with glue-pencil (see photo) and, finally, fold the entire strip into a thin tube.
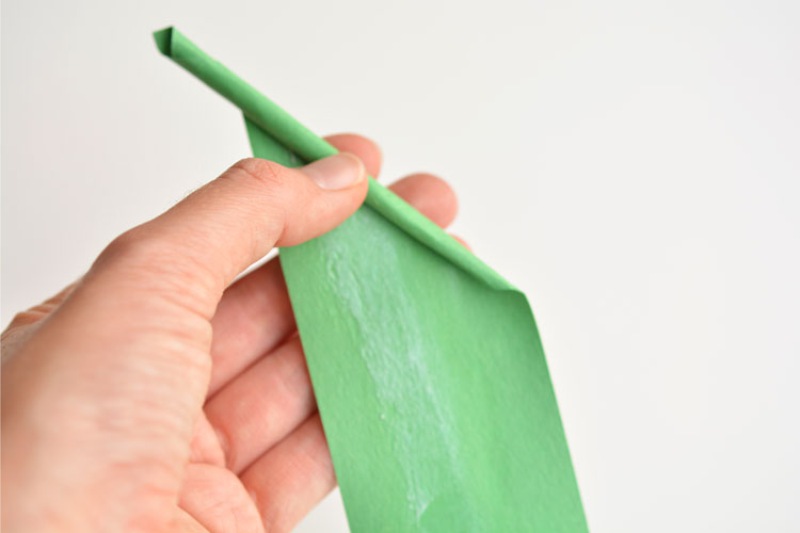
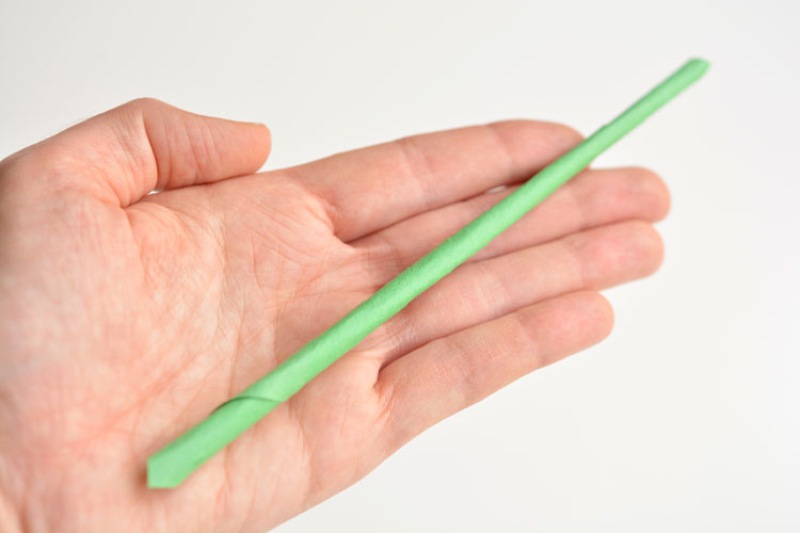
When you're done, it will look something like this:
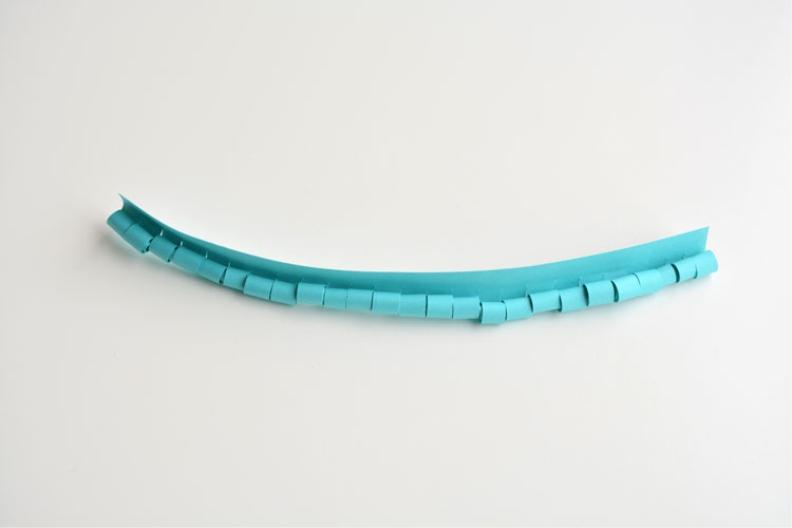
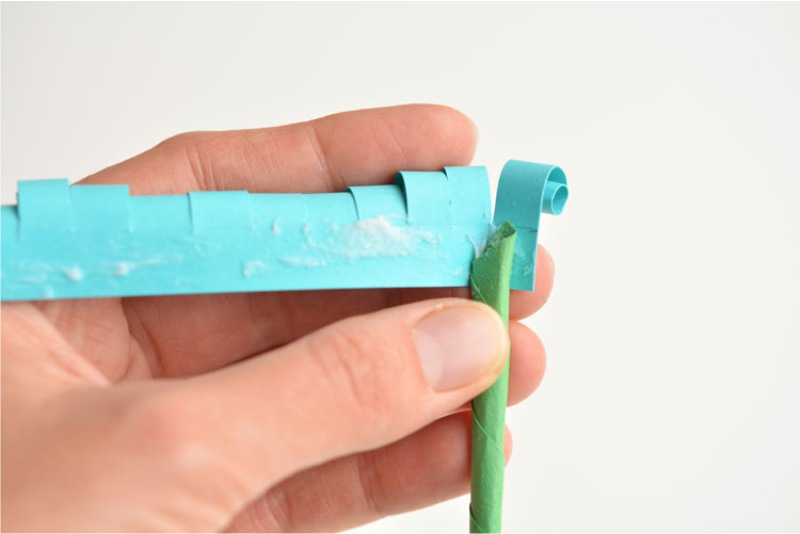
Step 6. It is time to fold the bud and glue it to the stalk. To do this, once again take the billet of the bud (a strip with curls) and grease its base with the wrong side.
Next, begin to tightly wrap the stem in a strip with curls from top to bottom and in a spiral, as shown in the following photos.
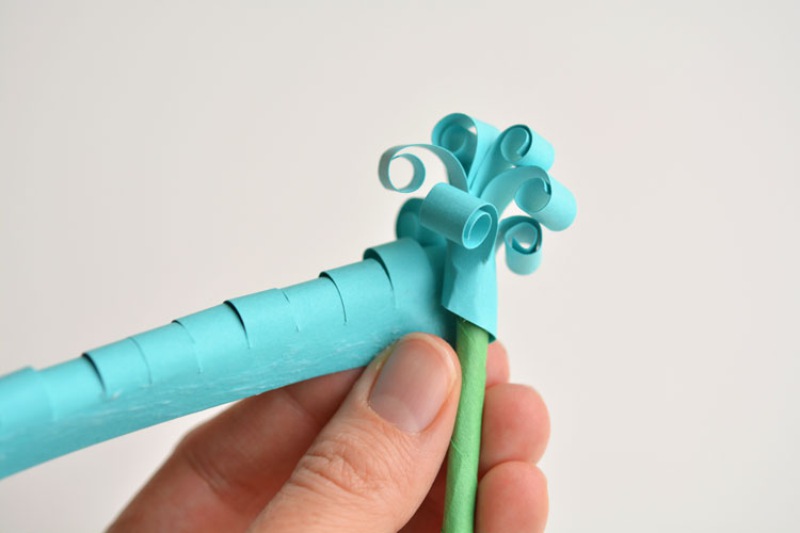
When the bud is formed, additionally fix its tip with glue.
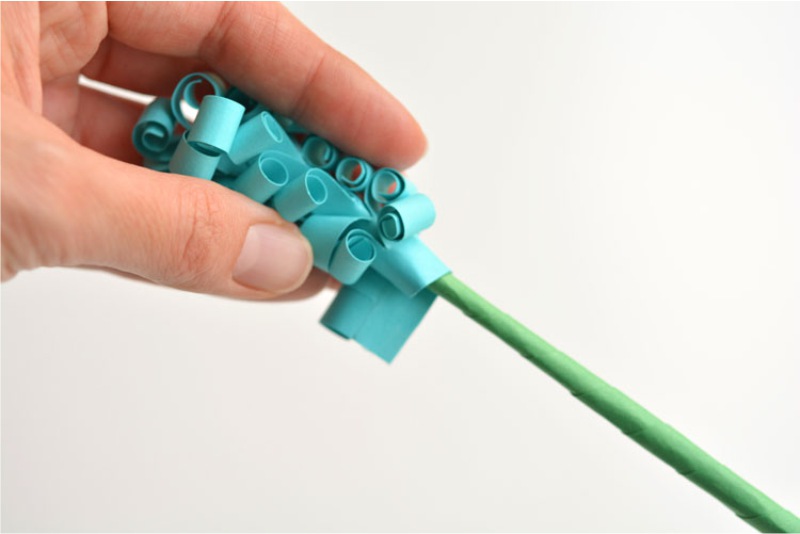
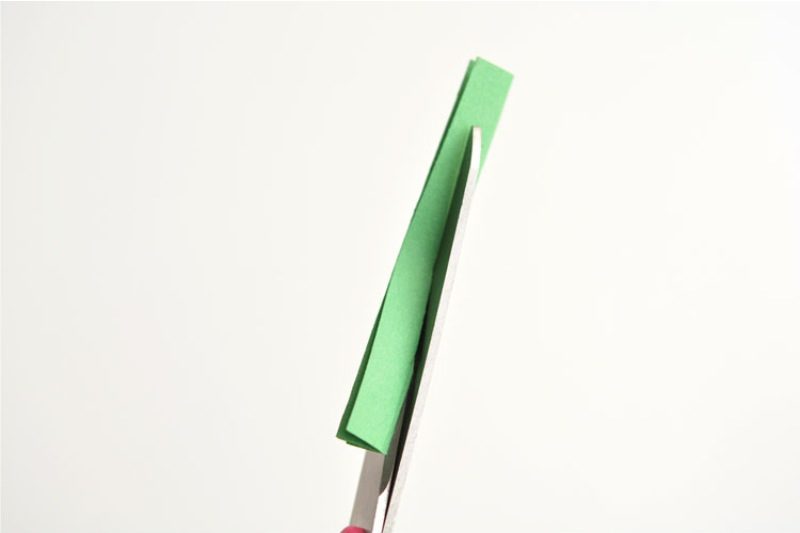
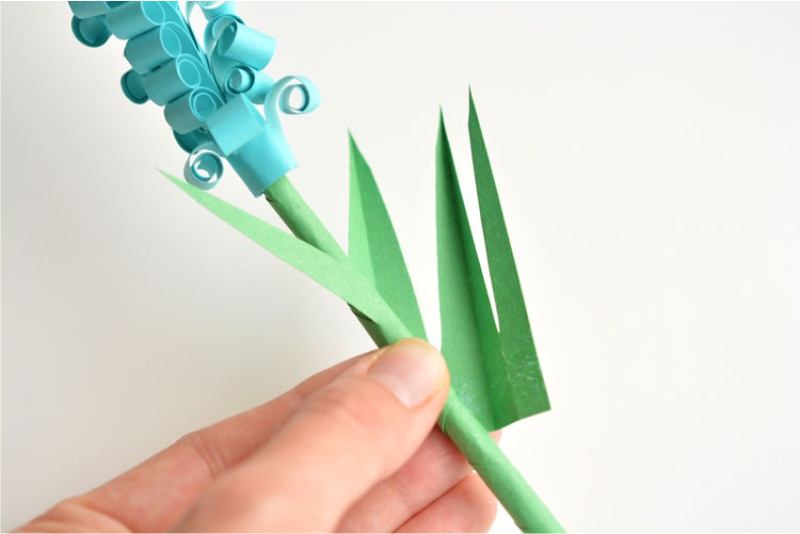
Step 7. Hooray, your first flower from paper is almost ready, it remains only to supplement the stem with leaves. To do this, cut a piece of green paper about 2.5 × 8 cm and fold it lengthwise into an accordion about 1 cm wide.
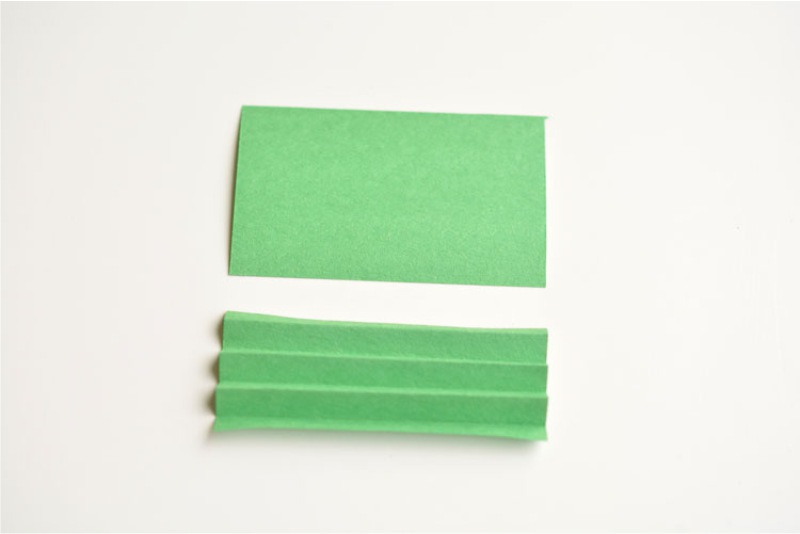
Collect the accordion and, departing about 1.5 cm from the bottom edge, give it the shape of a leaf with scissors.
 1
1
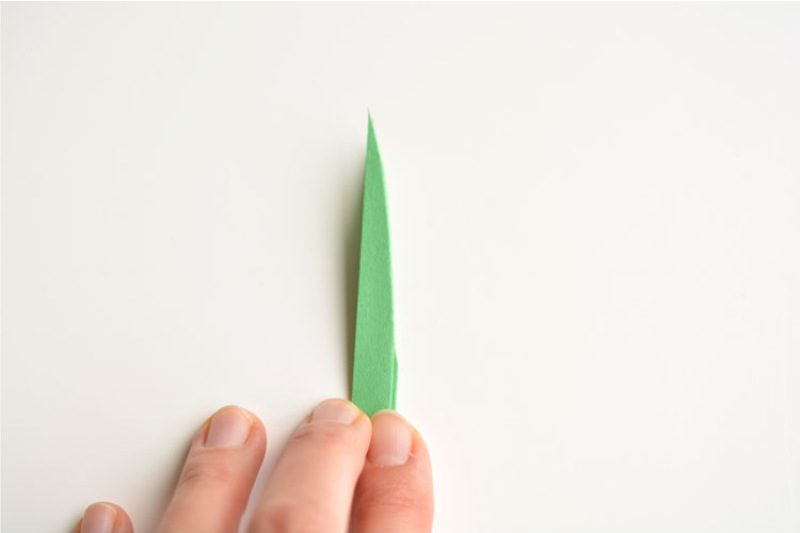
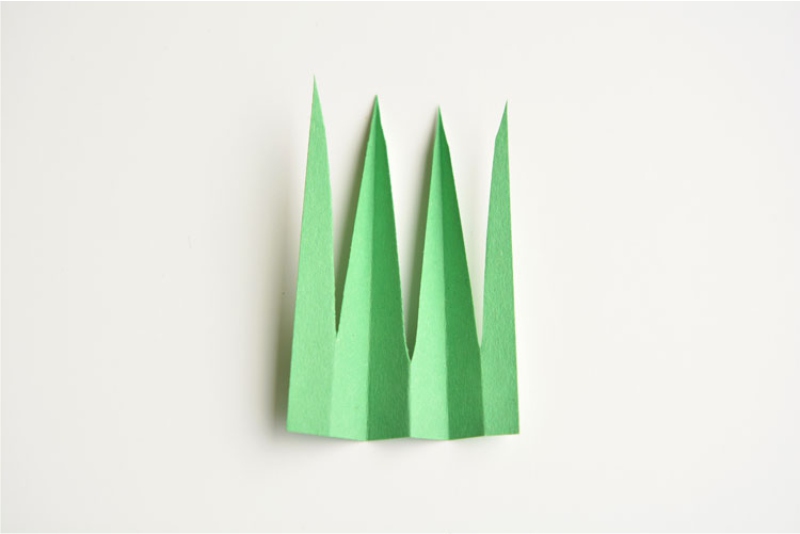
Unfolded, your blank should have 3-4 leaves and look something like the photo.
Step 8. Apply glue to the lower part of the leaves and place its corner about 5 cm below the bud and at an angle, as shown in the photo below. Next, wrap the billet tightly around the stem.
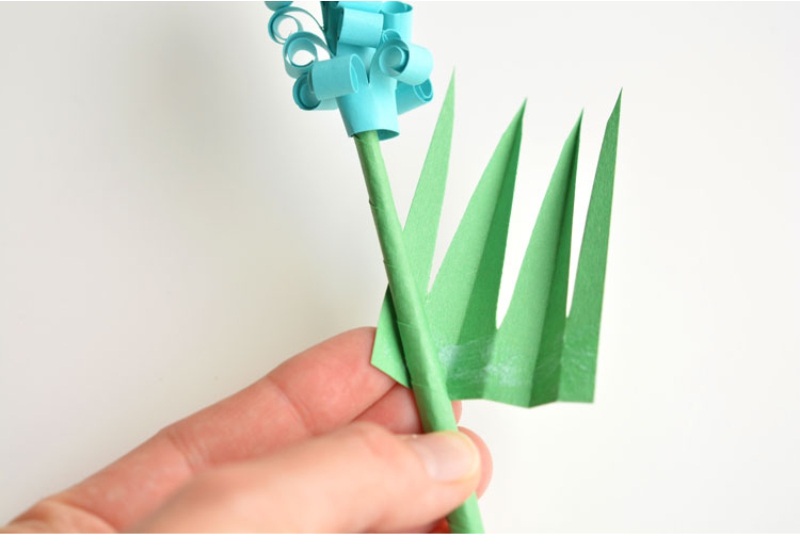
Well, that's all, hyacinth is ready! Repeat the process using different shades of paper to make a bouquet of paper flowers.
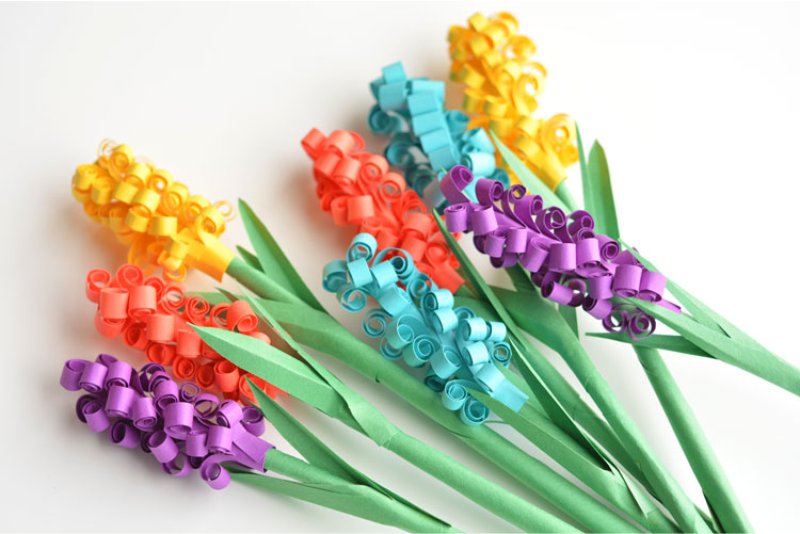
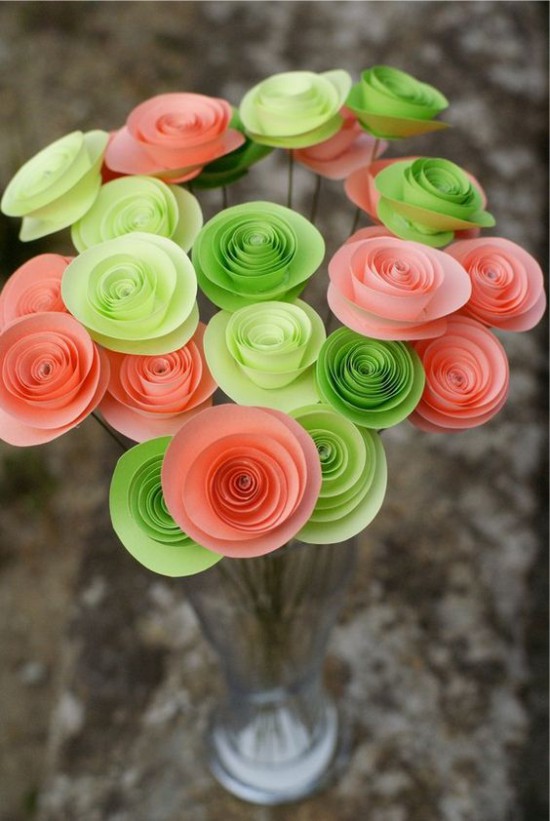
A bouquet of flowers from paper do it yourself
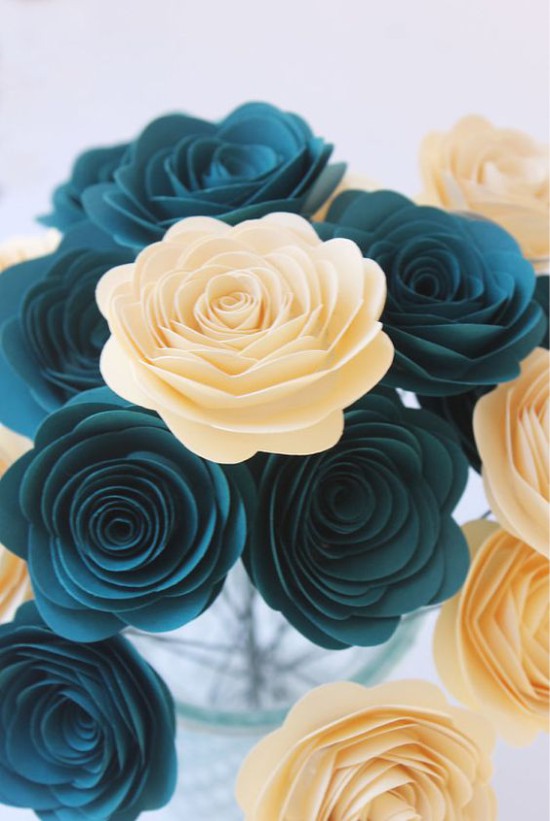
Master class number 4 - Roses made of paper (express method)
This master class will come in handy when you need to make flowers with your own hands super-fast, easy, low cost and in large quantities.
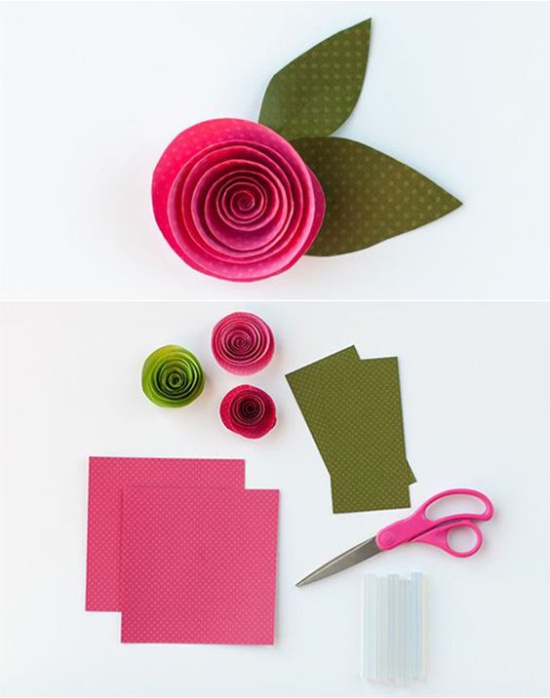
For work you will need:
- Any nice paper (even book pages will do);
- Green paper for leaves;
- Glue (thermo glue is best);
- Scissors;
- Pencil.
- Wooden skewers (needed if you want to make a bouquet).
How to make roses from paper:
Step 1. Cut a square sheet of paper approximately 12 × 12 cm.
Step 2. Draw a circle on your square and then draw a spiral inside it. It does not have to be perfect so that the roses turn out to be textured.If you wish, you can make it wavy at all, then the rose will have pronounced petals.
Step 3. Cut out your circle, then cut the workpiece along the helix line. In the end, you get something like a spring.
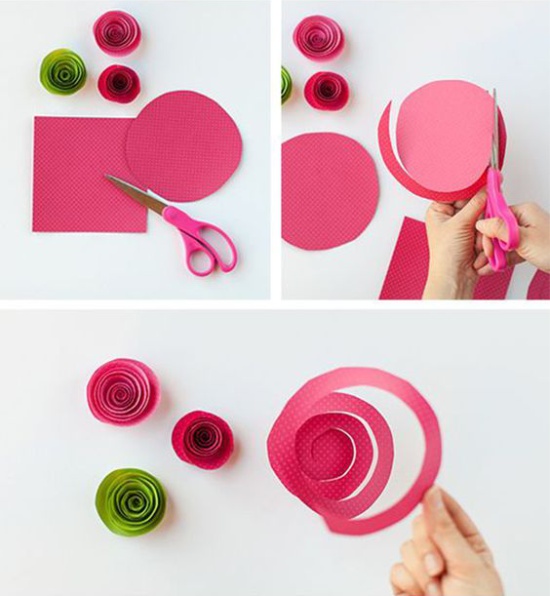
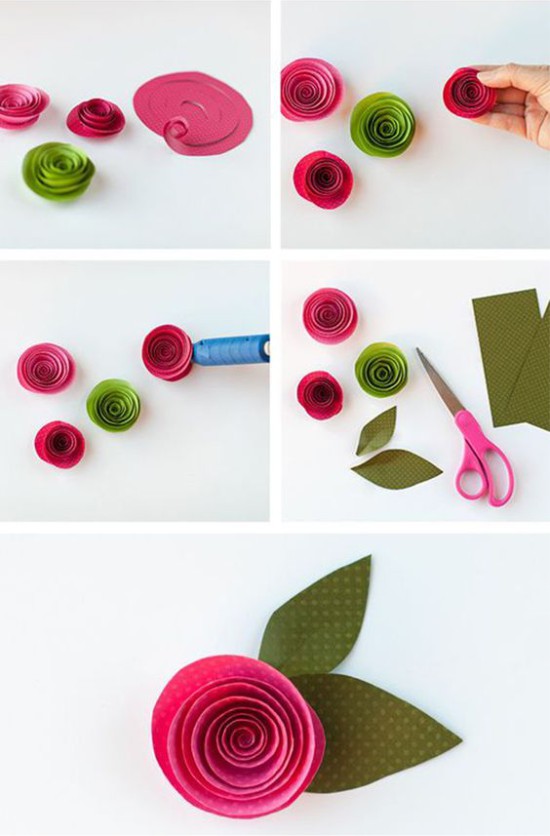
Step 4. Take the outer end of your "spring", twist it into a roll (loosely), then start to twist the entire tape around it. Hold the bottom of the flower so that the paper does not bloom.
Step 5. When you reach the base (the inside of the workpiece), stick a bud to it with a sufficient amount of glue. Voila, the first flower is ready!
Step 6. If desired, the rose can be supplemented with leaves. They are cut out of arbitrary shape and glued.
Step 7. If you want to make a bouquet, then paste the buds on the skewers or newspaper / paper tube. It is advisable to wrap the stems in a green paper ribbon.
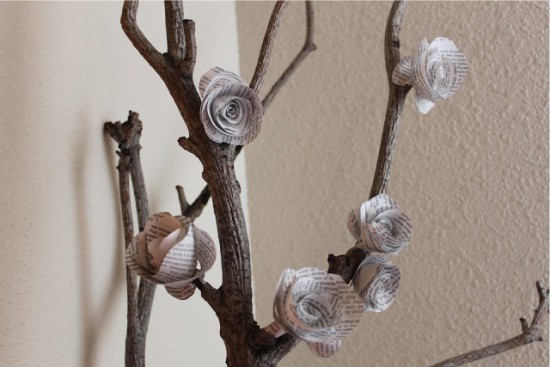
Here are some more do-it-yourself flower making ideas that you can realize with the help of our master class.
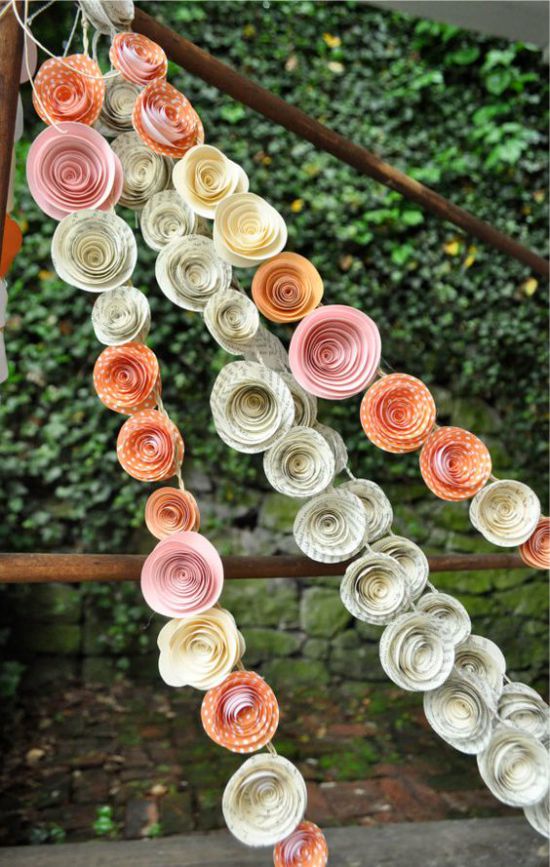
Wedding garland of colored paper flowers and book pages

 (Rate the material! Already voted:36 average rating: 4,69 from 5)
- 5 ideas and workshops on making handicrafts from napkins
- How to make a topiary with your own hands - 4 instructions for beginners and not only
- Topiary made from cones, acorns and chestnuts - photo-ideas and 2 master classes
- How to make a coffee topiary
- 8 seashell ideas for beginners
- 10 ideas crafts from cereals for children and adults