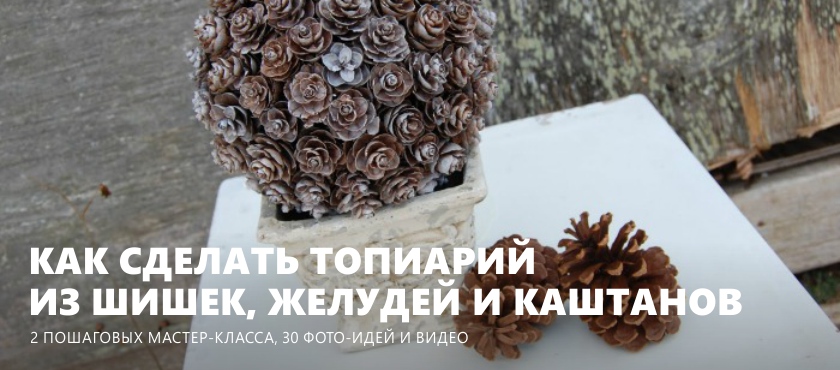
Topiary of cones, acorns and / or chestnuts is an eco-decor, which is especially good in autumn or winter decoration of the interior or dining table. We prepared 2 step-by-step workshops on making decorative trees with our own hands, as well as a selection of photo ideas and video lessons.
Memo on basic materials for beginners
Topiary consists of: crown, stem and base in a pot. With a crown, everything is clear - we will make it from cones, acorns and / or chestnuts. And what can be used as its basis? Most often for this purpose use foam balls (sold in stores for creativity or stationery) or balls of floristic foam (sold in flower shops).
You can use any stick as a stem: a strong branch (previously dried), a simple pencil, a knitting needle or a wooden stick. If you do not like the original look of the trunk, then you can wrap it with ribbons, twine, just paint or tint. Find a cute pot is not difficult. In fact, an ordinary clay pot is suitable for topiary of chestnuts, cones and acorns best. If desired, it can be painted or aged artificially.
As for the base, which will hold the tree trunk, here you can choose any assembly mixture (cement-sand mortar, putty, plaster or alabaster) or the same floristic foam / foam. If you prefer the first option, we recommend using alabaster. It is available, easily divorced and does not crack. And here is the instructions for its use:
- To fill 1 pot with alabaster you need about 1 kg of the mixture and about 3 glasses of water. Stir the solution for a couple of minutes. As soon as the mixture thickens to a consistency of thick cream, pour it into the pot, set the barrel and hold it in an even position for 2-3 minutes. Leave the mixture to dry for 12-24 hours.
See also: The basic instructions for making topiary do it yourself.
Master class 1. Round topiary of cones and not only
Since topiary is made on approximately the same principle, you can use our instructions to create topiary not only from cones, but also from chestnuts and acorns.

What you need:
- Flower pot;
- Ball base;
- Any mounting mixture or foam / floral foam for fixing the trunk in a pot;
- Pins with tips;
- Cones, chestnuts and / or acorns;
- Hot glue gun;
- Dry moss (can be replaced with sisal fiber);
- Wooden stick (can be replaced with a pencil);
- Ribbon (optional).
Master Class:
Step 1. First we need to prepare natural materials for work.
- Freshly picked cones need to be washed in water and then dried in an oven at 350 degrees for 10-15 minutes.
- Acorns and chestnuts just need to rinse and dry naturally. The main thing is to conduct a thorough inspection for the presence of cracks, which are dangerous because insects can live in them.Small bugs and worms may eventually move to other fruits.
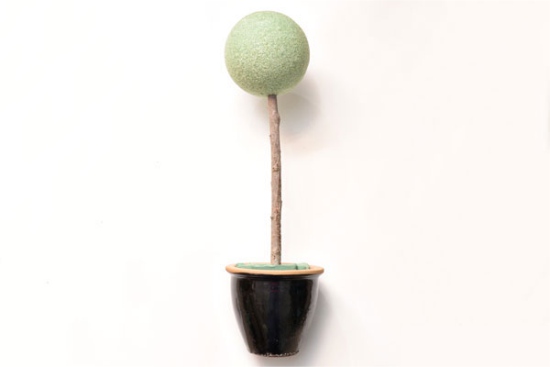
Step 2. Cut a wooden stick to about 45 cm (the height of the barrel may be different depending on the height of the pot, the diameter of the ball and your wishes about the height of the product). Paint the barrel if necessary.
Step 3. Insert the barrel into the ball and fix the attachment point with glue. If you work with polyfoam, then you need to pre-cut it with a knife and scissors.
Step 4. Paint the ball in a dark brown color, so that the gaps in the crown of the finished product are hardly noticeable.
Step 5. Dilute your assembly mixture according to the manufacturer’s instructions or according to our instructions dilute alabaster (see Memo for beginners). Fill the pot with the mixture, not reaching 2-2.5 cm to the top edge of the pot. In this project, instead of the mixture was used floristic foam cut into cubes.
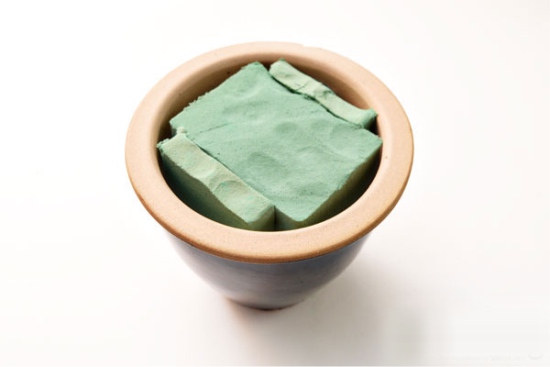
Foundation topiary floristic foam
Step 6. Insert the barrel into the center of the pot. If you use any mounting mixture, the barrel should be inserted immediately after mixing and held until the mass in the pot hardens.
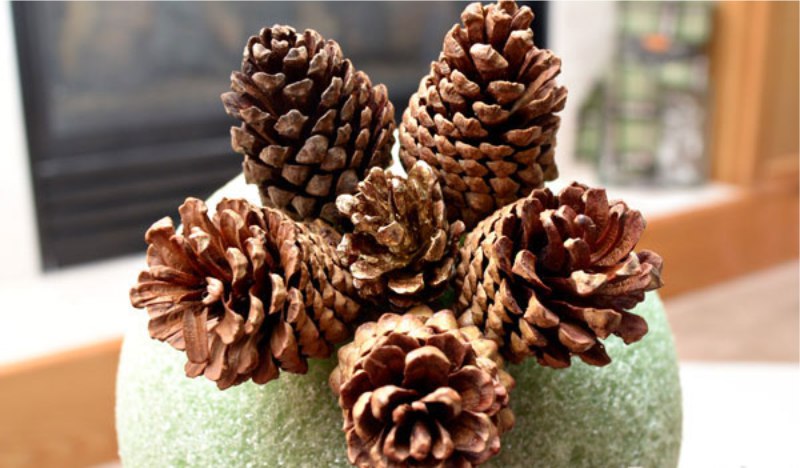
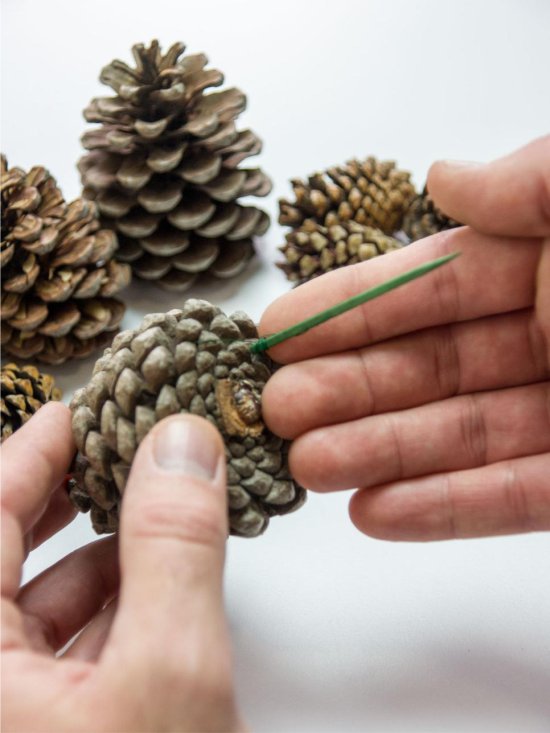
Step 7. Heat the glue gun and stick the cones / acorns / chestnuts on the tips of the pins as shown in the photo below. Before you start designing the crown of the tree, it is desirable to divide your materials into three groups - large, medium and small.

In fact, it is not necessary to use pins to attach the cones / chestnuts / acorns to the base, because you can simply glue them. However, it is with the help of pins that the easiest way to create a neat round crown.
- By the way, fresh and soft acorns and chestnuts can be mounted on toothpicks. If your fruit has already hardened, try soaking them in water for a while.
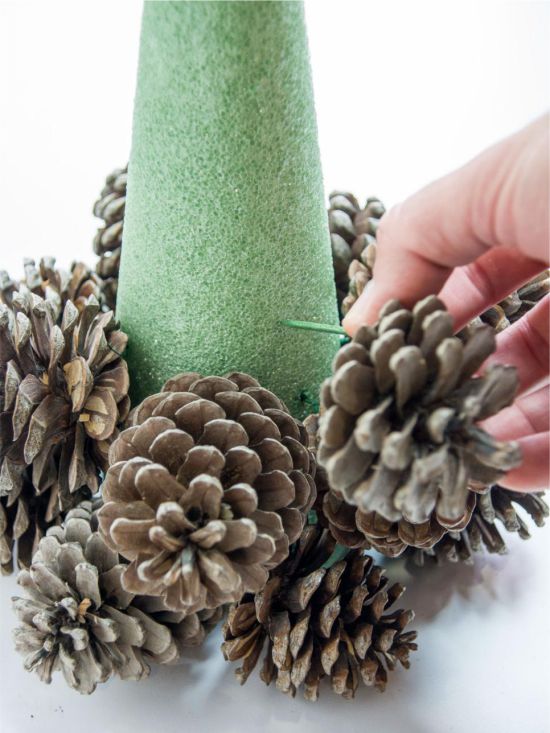
Step 8. Now it’s time for the most interesting thing - the decoration of the tree crown. Our task is to insert pins into the ball-base so that the cones / acorns / chestnuts are located as close as possible to each other and at the same time evenly so that the crown turns out to be round. If the bumps are of a different size, then first you need to glue the big bumps on the ball, then the medium ones and then the small ones. If the material has approximately the same size, then they can be glued in rows according to the principle of honeycomb.
Fastening cones to the base
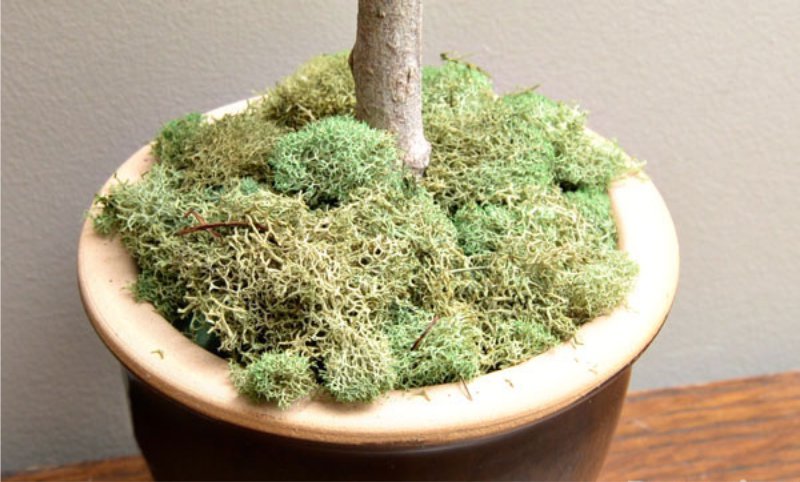
Step 9. Cover the “soil” in the pot with dry moss (see photo below) or any other material you have and use hot glue to hold it in place.
Step 10. You can add topiary jewelry, such as ribbon, tied around the trunk.
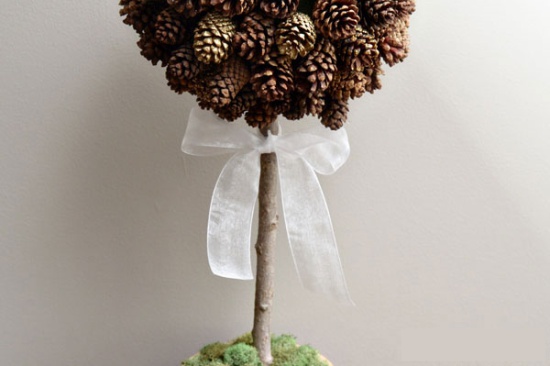
In the next selection of photos we present other design ideas for autumn and winter topiary made of natural materials.
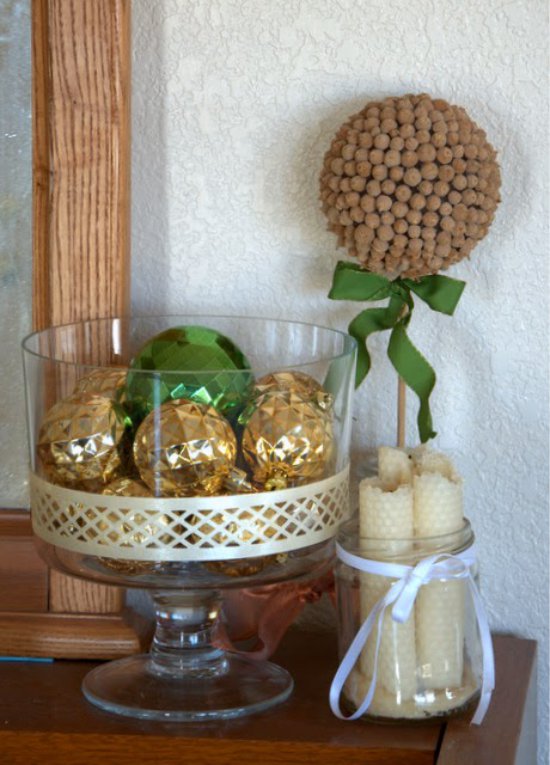
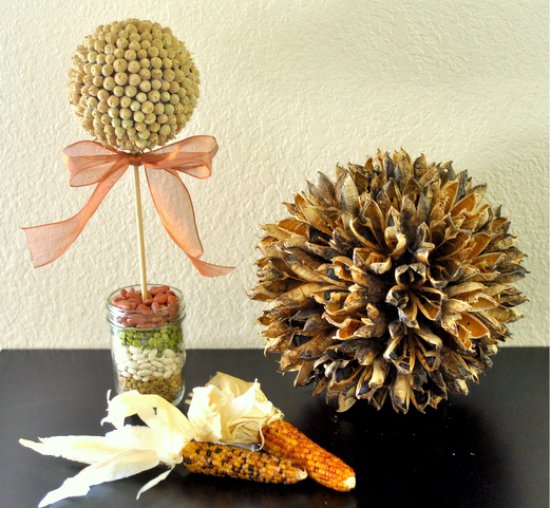
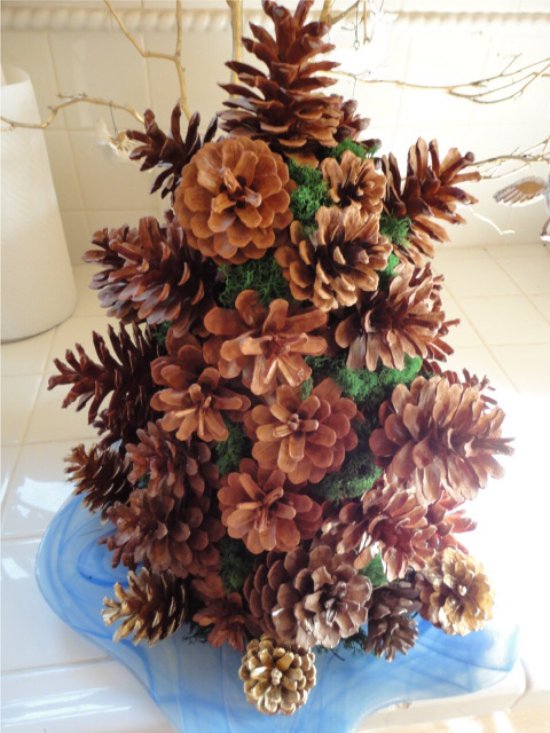
Acorn Topiary
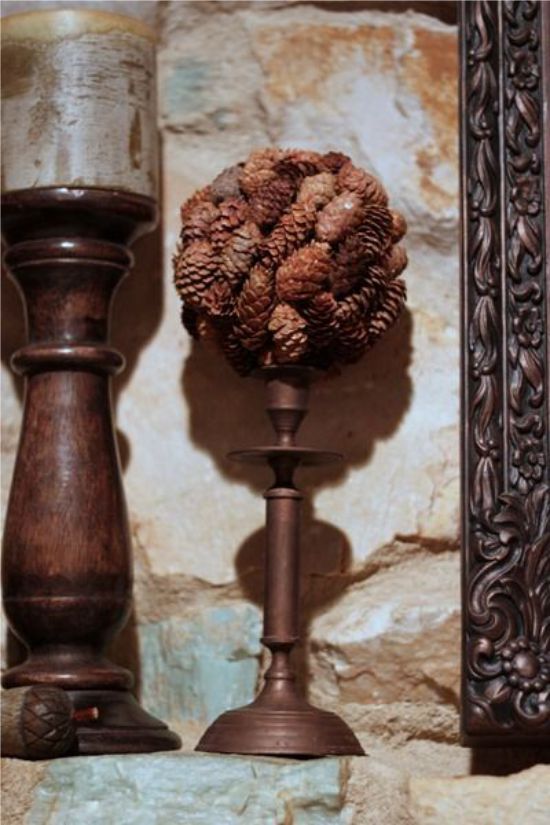
Topiary with crown of spruce cones on the candlestick
This topiary has no trunk, and its crown is framed only by cones halves, namely tops. Note the idea if you want your crown to have no spaces at all.
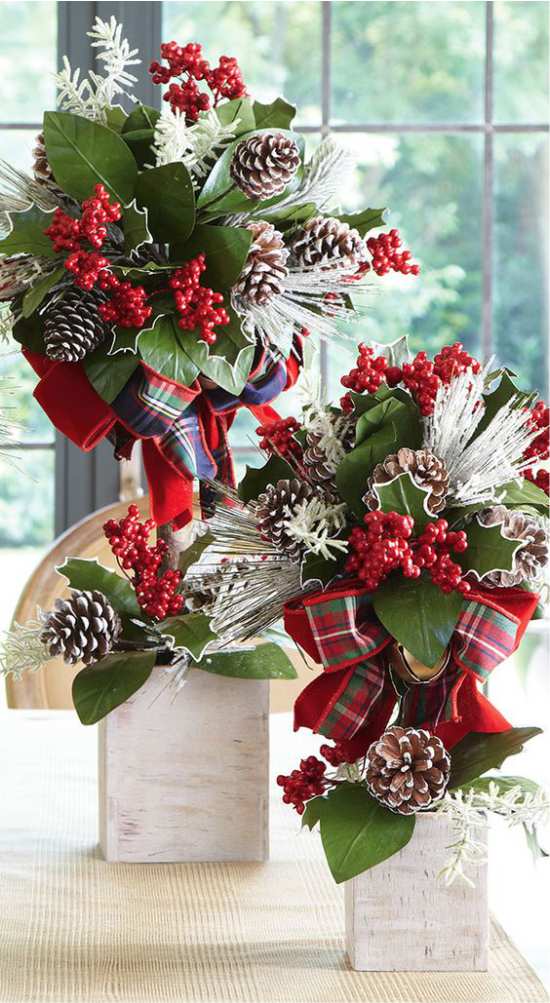
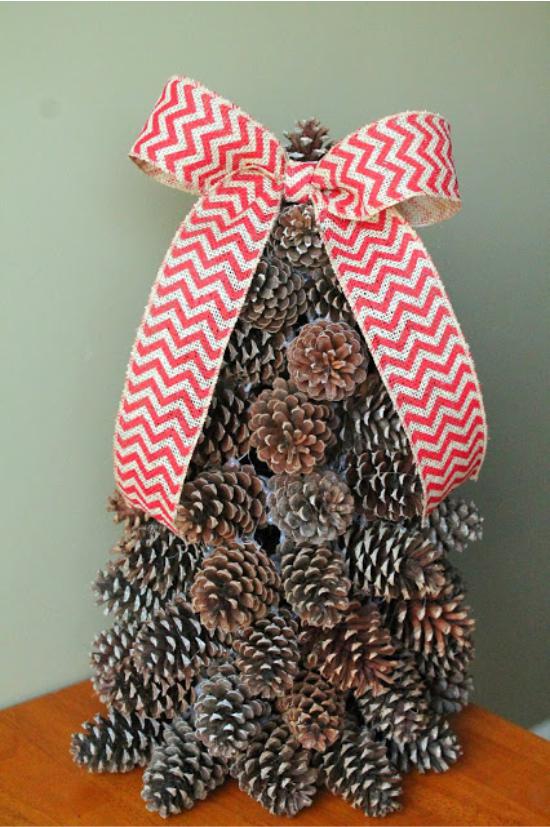
New Year Topiary made from cones, ribbons and holly leaves and artificial leaves
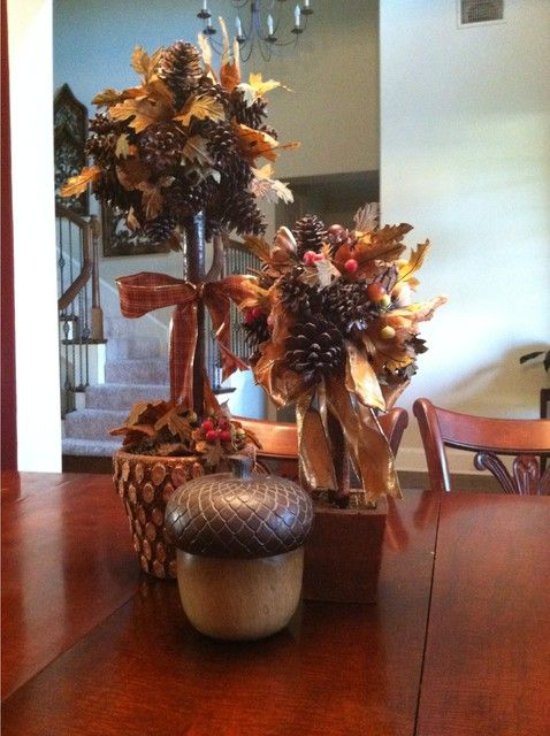
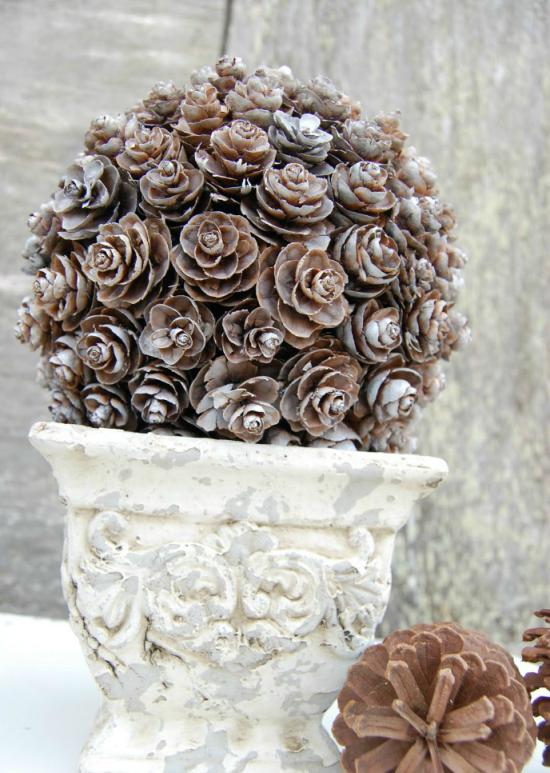
Pine cones and leaves topiary
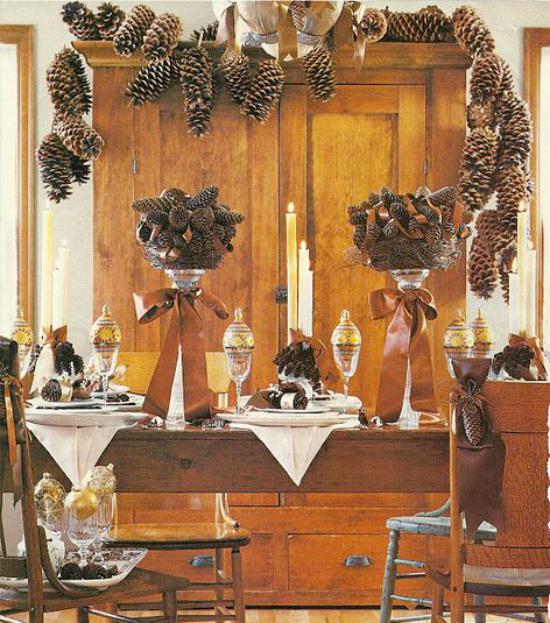
Composition of a pair of topiary in a festive table decoration
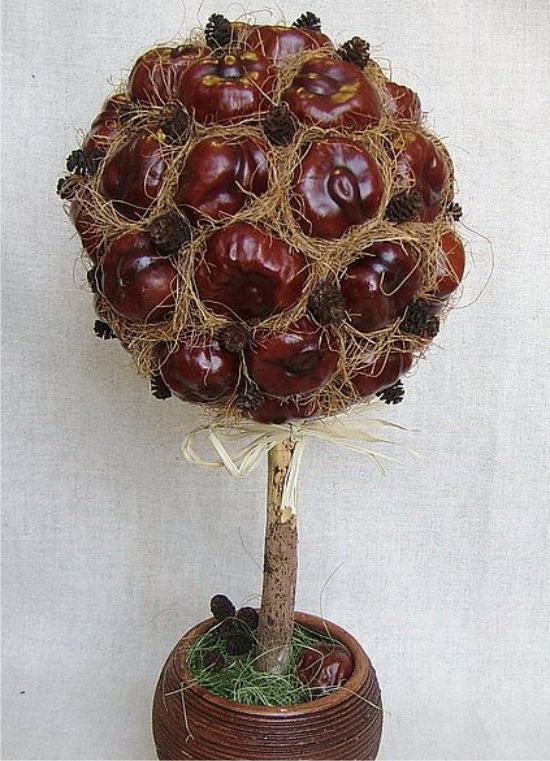
And here are the trees with a crown of chestnuts. The peculiarity of working with them is that between the fruits it is necessary to paste in additional decor to close the gaps. For example, it can be rowan berries, sisal or small cones. Also keep in mind that due to the severity of chestnuts, it is desirable to glue them and attach them to the pins.
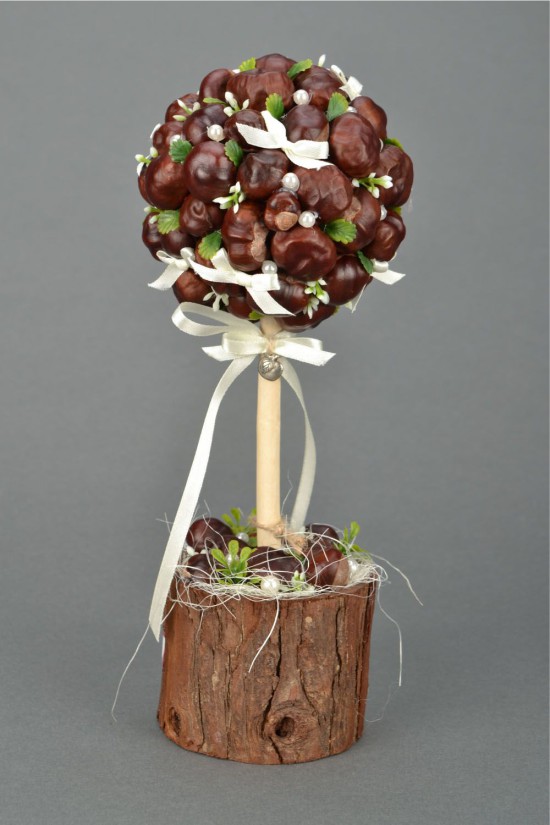
Chestnut, satin ribbon and bead topiary
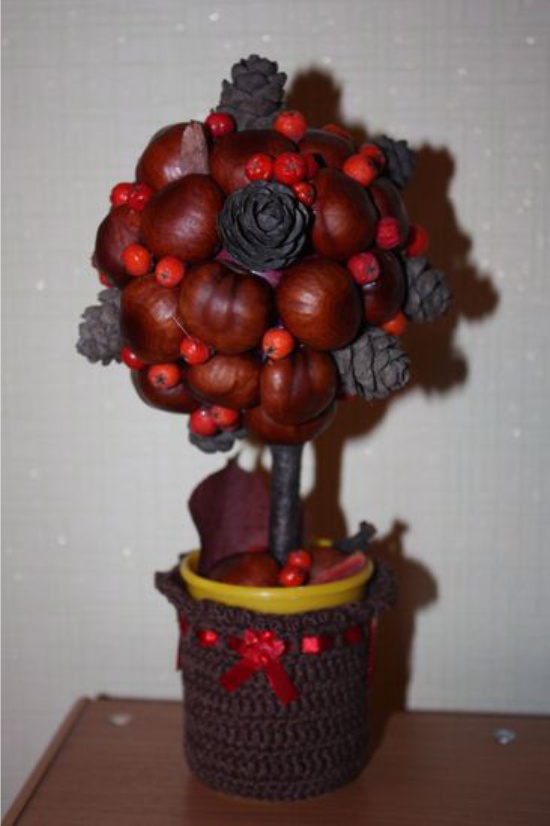
Topiary of chestnuts, cones and rowan berries
Chestnut, pine cone and sisal topiary
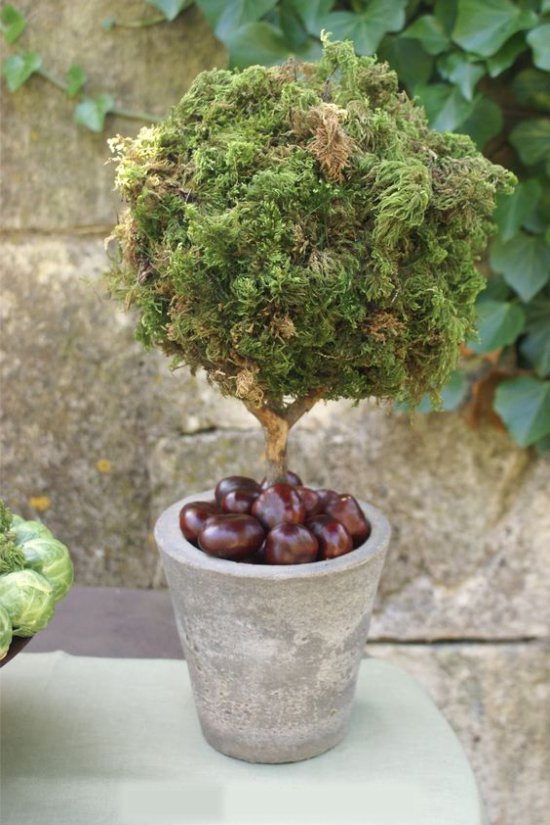
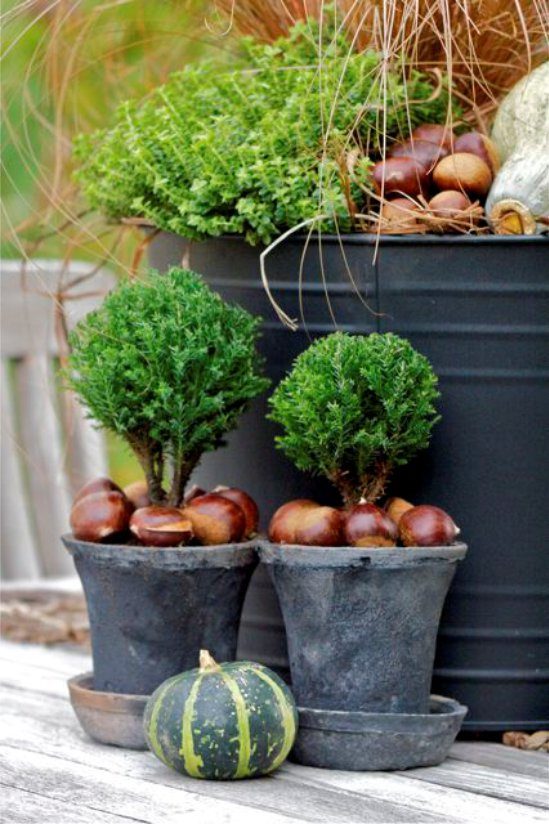
By the way, chestnuts can be used not only for the decoration of the crown. Below are photo examples of live topiary with chestnuts in a pot.
See also the material: Flowers from ribbons do it yourself - 6 workshops for beginners.
Now we offer to watch a video on how to make a topiary of cones, chestnuts and acorns with your own hands.
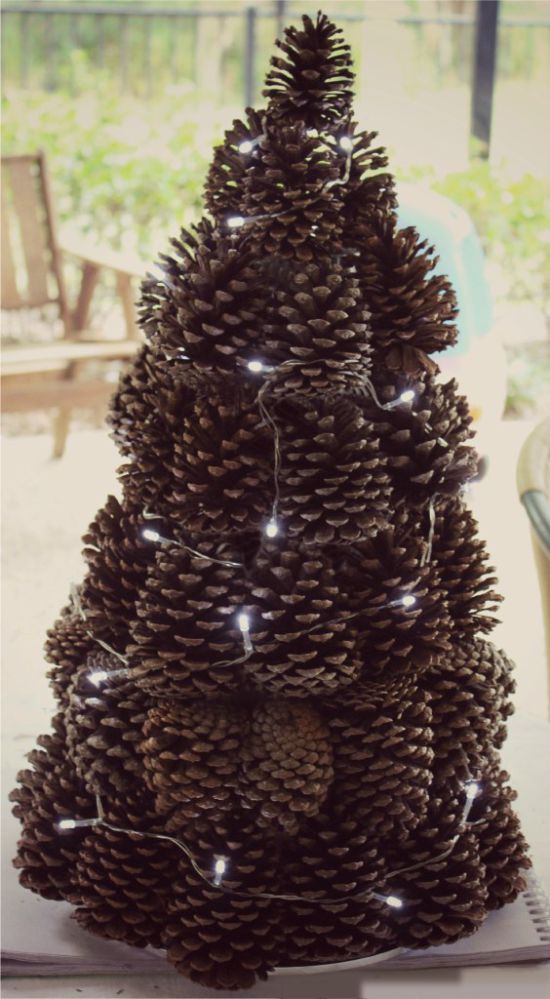
Master class 2. Christmas tree from the cones
In addition to the traditional round topiary of cones, chestnuts and acorns, you can make a topiary-Christmas tree. This Christmas decoration you can put on a festive table, on a mantelpiece or at the entrance to the house.
Here is what you need:
- Pine cones of different sizes - from large to small.
- The base is in the form of a cone of foam or floristic foam. If you do not have a finished base, then you can make it yourself from paper, newspaper lumps and cardboard.
- Hot glue gun.
- PVA glue.
- Dark brown acrylic or brown paper.
- Glitter (optional).
- Brush.
Master Class:
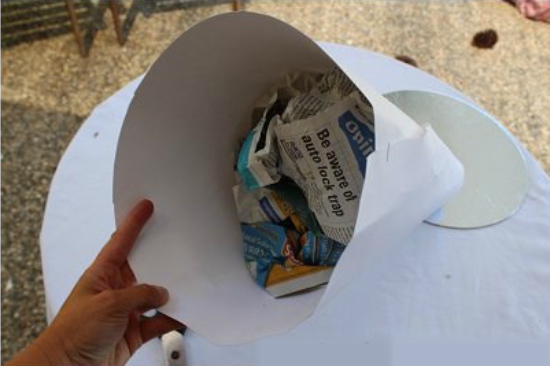
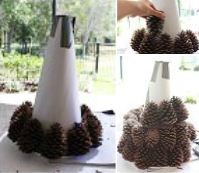
Step 1. Skip this item if you have a ready base for the Christmas tree. If there is no foundation, then we offer to do it yourself. Roll a piece of paper (eg, A3) into the cone of the desired size. Fix the cone with scotch tape and cut off the excess paper at the base and at the top (there will be a lump sitting there). Now tightly “tamp down” the blank with crumpled sheets of newspaper.
Next, cut out a cardboard circle, the diameter of which is 2-3 cm larger than the diameter of the base of the resulting cone. Glue the cone to the circle with tape as shown in the following photo. Woo-ala! Basis for winter topiary ready.
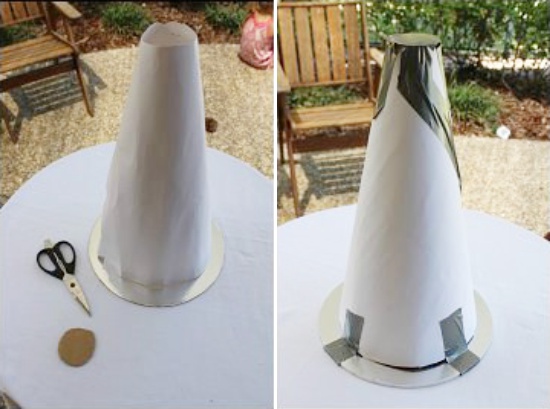
Step 2. In order to disguise the original color of the base, you can paint it with dark brown paint or just wrap with brown paper, such as kraft paper.
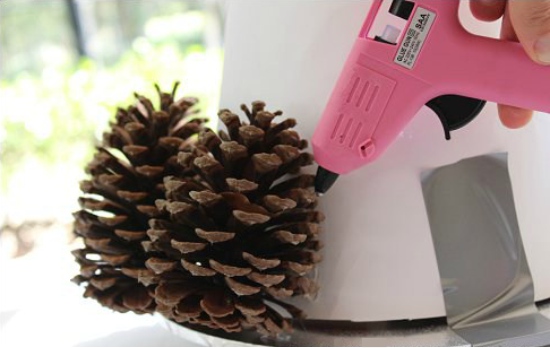
Step 3. When the paint on the cone is dry or it is completely wrapped in paper, proceed to gluing cones. First glue the first row of the largest cones to the bottom of the base.
Step 4. The second row of cones begin to glue upside down (tops down) and observing the chess order (see photo on the right). This is necessary so that the intervals between the "needles" were minimal. Continue to glue the bumps on the same principle: alternating rows from and from inverted and non-inverted cones and observing chess order between rows.
Step 5. If the gaps between the cones turned out to be too noticeable and you are not satisfied with this, then you can add chestnuts, acorns, artificial berries or dry moss to the topiary.
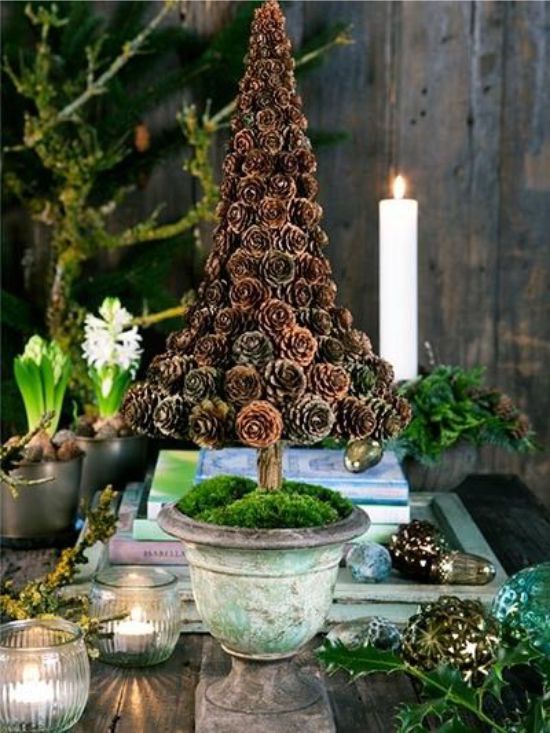
Step 6. It remains only to set the tree on a massive candlestick or “plant” in a pot.
In the next selection of photos we present other interesting ideas for the design of a New Year's topiary from cones in the shape of a Christmas tree.
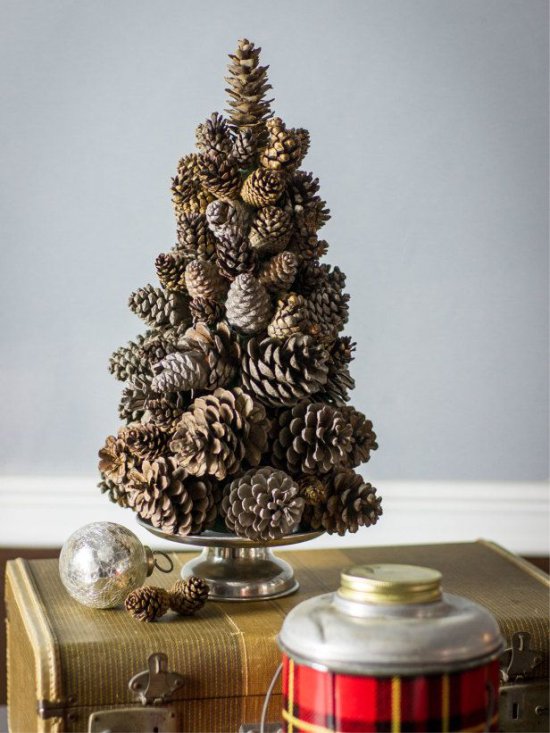
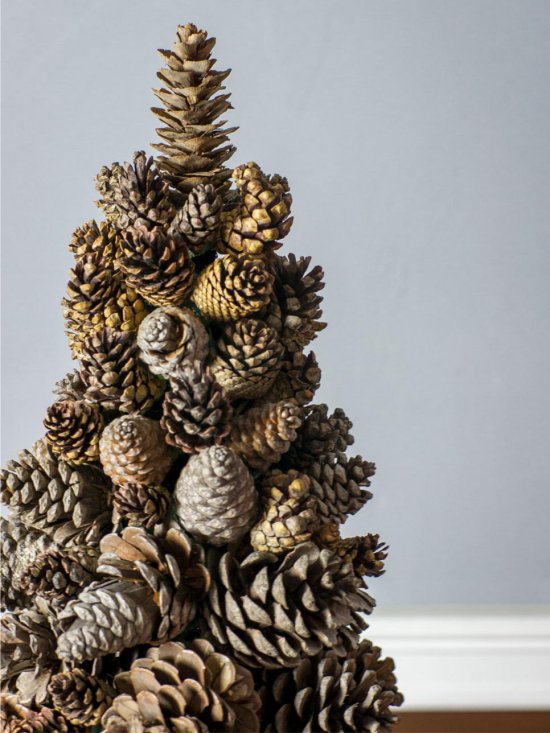
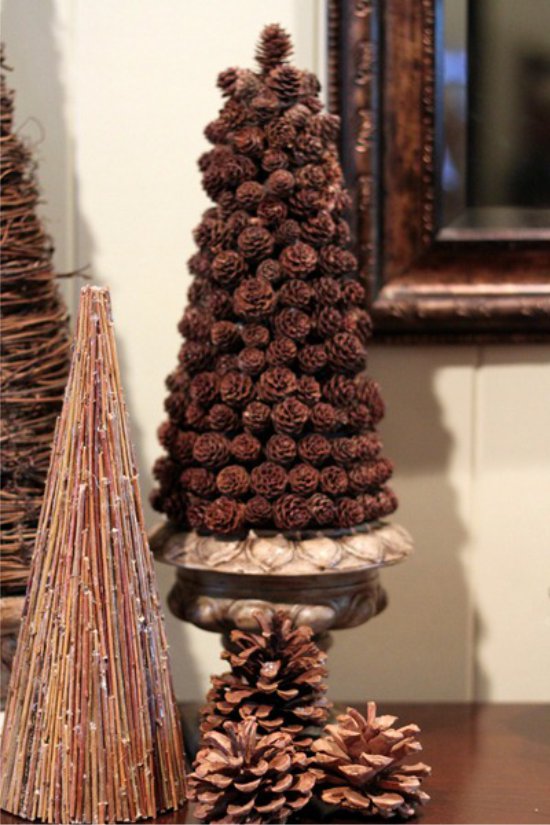
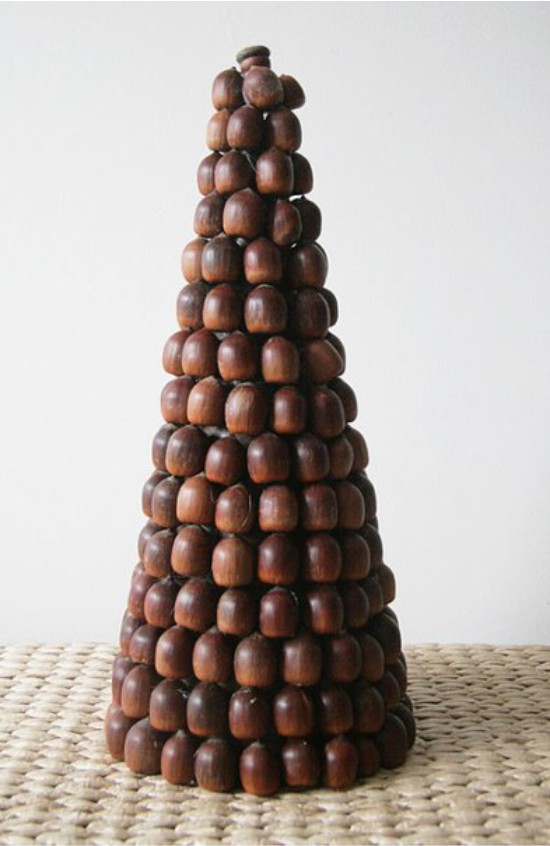
Christmas tree of small cones

The composition of a pair of trees
This Christmas tree has no basis, it was lined up with cones glued together. The disadvantage of this method of manufacturing topiariya is the increased consumption of glue and its visibility
Acorn Topiary
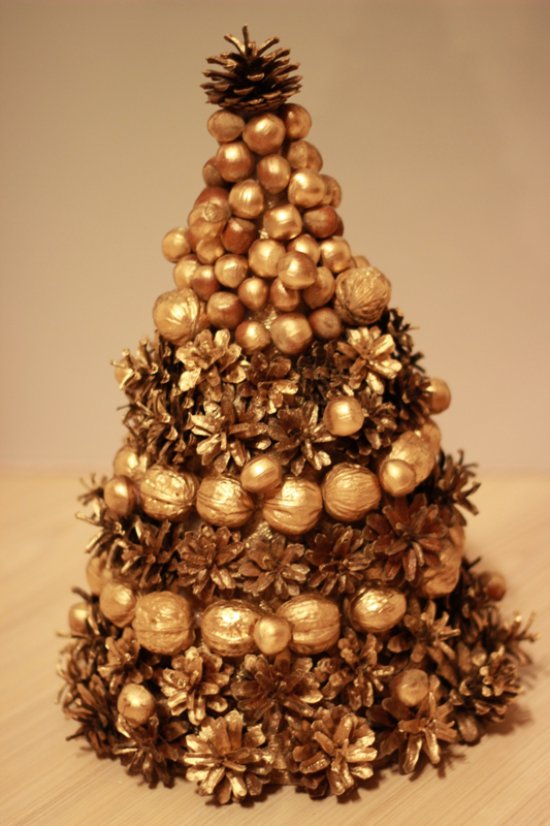
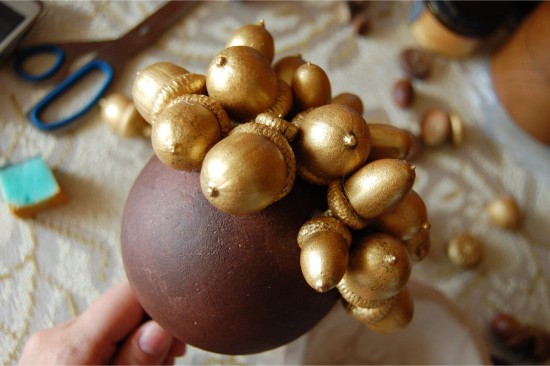
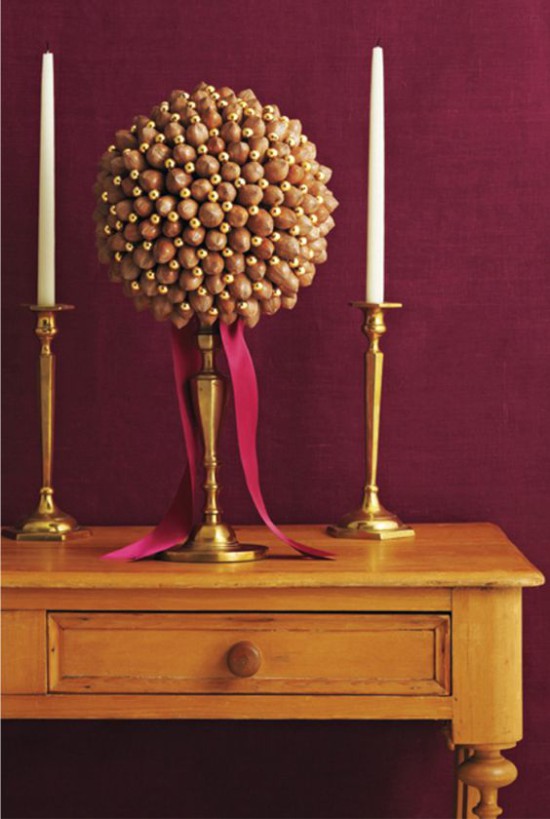
Nuts and cones topiary covered in gold paint
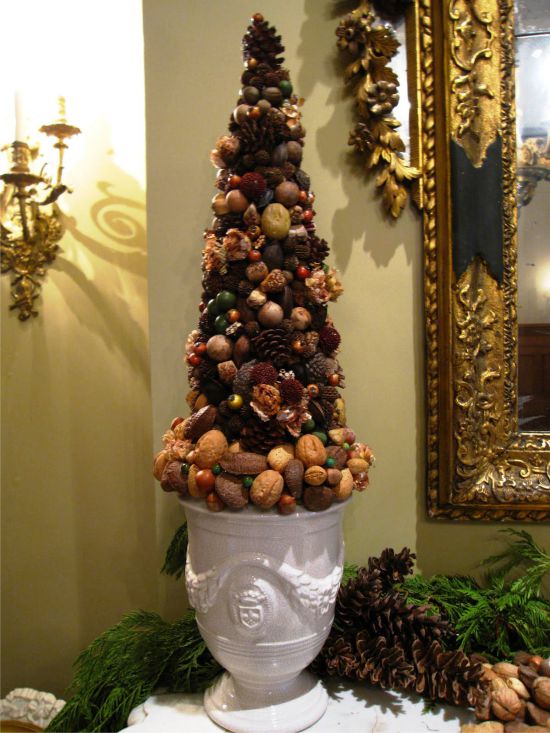
Topiary of nuts, cones, berries
See also: How to make a coffee topiary

 (Rate the material! Already voted:10 average rating: 4,70 from 5)
- How to make a topiary with your own hands - 4 instructions for beginners and not only
- 6 workshops and ideas of autumn crafts for adults and children
- 8 seashell ideas for beginners
- Crafts from pasta - 15 ideas for adults and children
- 10 ideas crafts from cereals for children and adults
- DIY handicrafts for the kitchen - the best ideas